
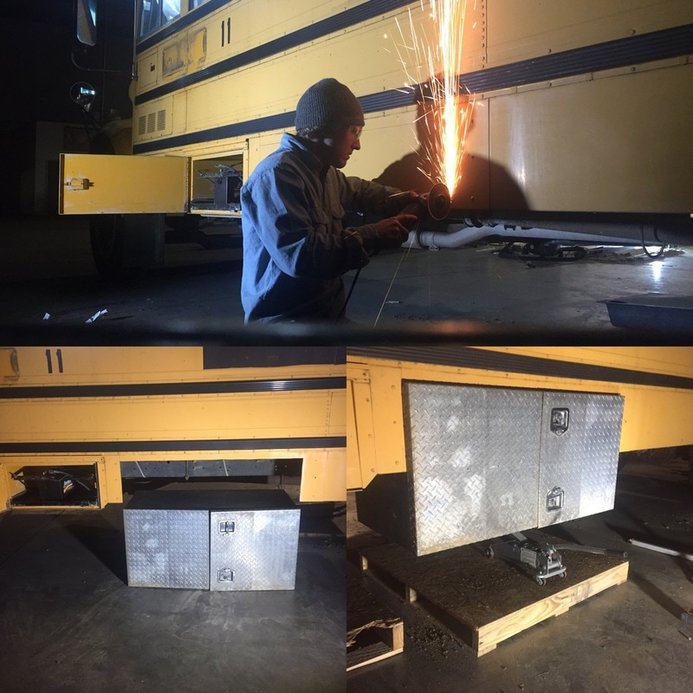
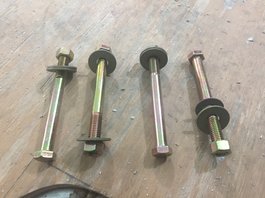
  While we were waiting for our spray foam to be delivered, we had some down time to work on other projects. We found some really good deals on these used tool boxes for extra storage. The aluminum one measures 48''w x 24''h x 24''d on the drivers side and will be used for our solar power battery bank/electrical component storage. The other box is made from steel and measures 72"w x 16"h x 16''d and is located just behind the rear axel on the passenger side. This box will most likely store camping supplies(chairs, cooking utensils, hammock, etc). This process was fairly simple and didn't cost a whole lot of money. We only bought eight 6" Grade 8 Bolts with two washers and a nut for each bolt and used a couple 2" x 3" studs we had laying around as well as some Threadlocker to prevent nuts from vibrating loose. The first thing we did was locate where we wanted them, then assessed weather or not it would work with the structure of the bus. Our bus has a 12" skirt that runs from the front to rear wheels of the bus and is held rigid with gussets extending from the skirt to the underside of a floor joist which had to be removed for the tool boxes to fit in the desired location. To remove the gussets, the rivets attaching them to the floor joist had to be drilled out and pried off. We made the rough opening width a 1/2" wider than the box measurements and made the top cut at the bottom of the floor joist. The aluminum box has doors that open to the side so we either had to make our width opening another 3" bigger or pull the box out to the depth of the doors so that they could fully open. We didn't want the 1.5" gap on each side, so we decided to pull the box out a little. Once the opening was cut and the gussets broke free, we determined where we wanted the bolts to penetrate each box, then pulled that measurement off the outside of the bus and marked the location on the underside of the bus. We used a 3/16" metal bit and predrilled each hole from the underside of the bus. Then came back and drilled the same holes with a 1/2" which was long enough to penetrate through the foam and subfloor inside the bus, giving us the exact location of each bolt. Then we lifted each box into place using a car jack. From the inside of the bus, we could now drill back down through each hole into the box and then use a 1.5" paddle bit on each of the bolt holes drilling down only through the subfloor and foam. This gave an opening big enough for a washer on each bolt and recessed them below the subfloor so there will be no issues with any kind of protrusions in the finished floor. To distribute weight on the bolts holding the boxes, we ran a 2"x3'' studs inside the length of the box; one up front and one in the back. We held each board in place and marked the location of each bolt, then drilled holes accordingly. The lumber was then put into position and capped with a washer and nut. Finishing out the rough opening of each box, a piece of L metal will be riveted over each side of the rough opening to give it a clean look. Since the doors on the aluminum box will sticking out past the side of the bus, the thought of water getting inside the box became a potential issue. The steel box already has a rain guard on the top, so we will be creating our own rain guard on the aluminum box by bending a piece of metal to a Z shape to mount above it. 
1 Comment
Getting the insulation done was probably the most excited Matt and I have been since buying the bus. It's a big step to get this part done because now we can start framing and making it look like a real place to live! 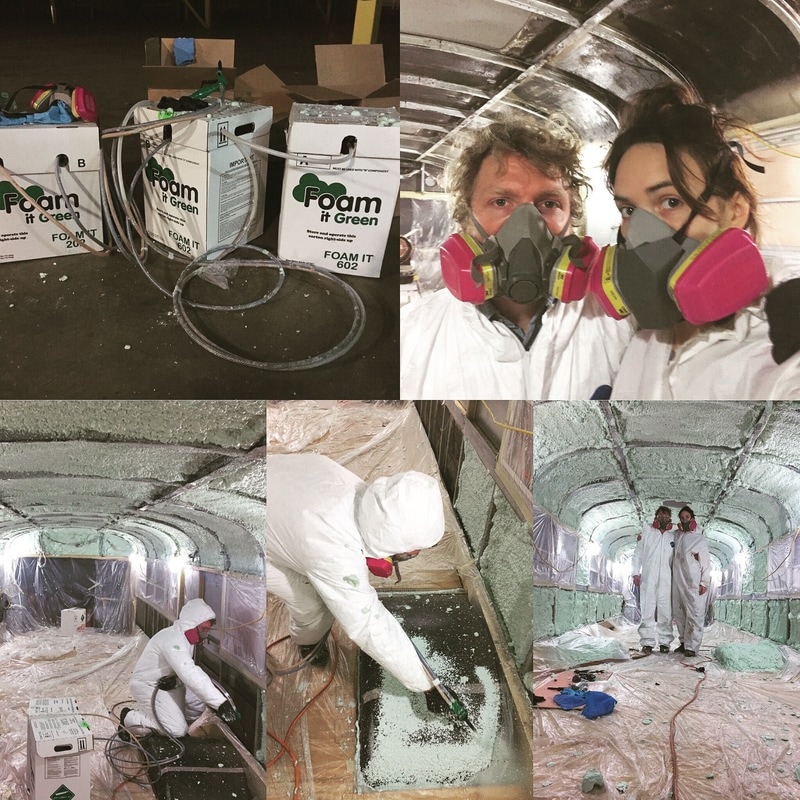 To prep for insulation, we covered any exposed wires, windows, floors, and dash with painter's plastic and used a grinder with a wire brush wheel to remove the remaining fiberglass insulation that was glued to the panels. We did this so the spray foam would have a nice clean surface to bond to. We went with Foam It Green for the insulation. There are several other spray foam companies out there to choose from but for the price and the additional items they sent with the tanks and their good track record, we decided on Foam It Green. The tanks we got were the 602 closed cell fast rise formula which covers approximately 600 square feet. We also had a 202 kit that we had left over from another job that we used to fill in any low spots once the other tanks were used up. The process is fairly simple, although there are some things that can make it a lot more efficient. First off, our bus is stored in a warehouse which is climate controlled up to 45 degrees so we had to run a salamander in our bus for an hour to get the metal within the temperature range recommend by the manufacture (65F-85F). When the metal was at the appropriate temperature, we suited up with full body Tyvek suits, respirators, gloves, and eye protection. Once we unboxed the equipment, we shook each A&B tank for 60 seconds then attached the lines to the valves and clipped the spray nozzle onto the gun. Since we weren't sure if we would cover the entire space with the 602 tanks, we started on the ceiling and head walls. This way, if we ran out, it would be easier to insulate the wall cavities with foam board opposed to the curved ceiling or head walls at each end of the bus. While Matt sprayed the foam, I helped by moving the tanks down the line as he moved and also shook each tank periodically throughout the process which is supposed to help get the most out of the tanks. I also kept an eye out for low spots and gave him new nozzles when they needed replaced. When the 602 tanks were out we hooked up the 202 tanks and went over the entire bus and thickened foam where we desired. The 202 tanks we got had been sitting in a shop for a couple years and about 3/4 of the way through the tanks the mixture started getting inconstant so we stopped there. Our bus measures 26 feet from the rear to the passenger seat and we ended up having more then enough in the 602 tanks to cover 1" throughout our bus. Since we had the extra 202 tanks, we figured we would use them for any extra spots. This process could be done with one person but definately much easier with two people and it only took us just over and hour to spray from start to finish. The next day, Matt went to the bus and use a 26" hand saw and an Irwin 213104 Pull Saw Dovetail for the smaller, hard to reach areas. This only took an hour since he was diligent during application so there wasn't a ton of over spray. Overall, we really happy with the results and are excited so start framing soon. 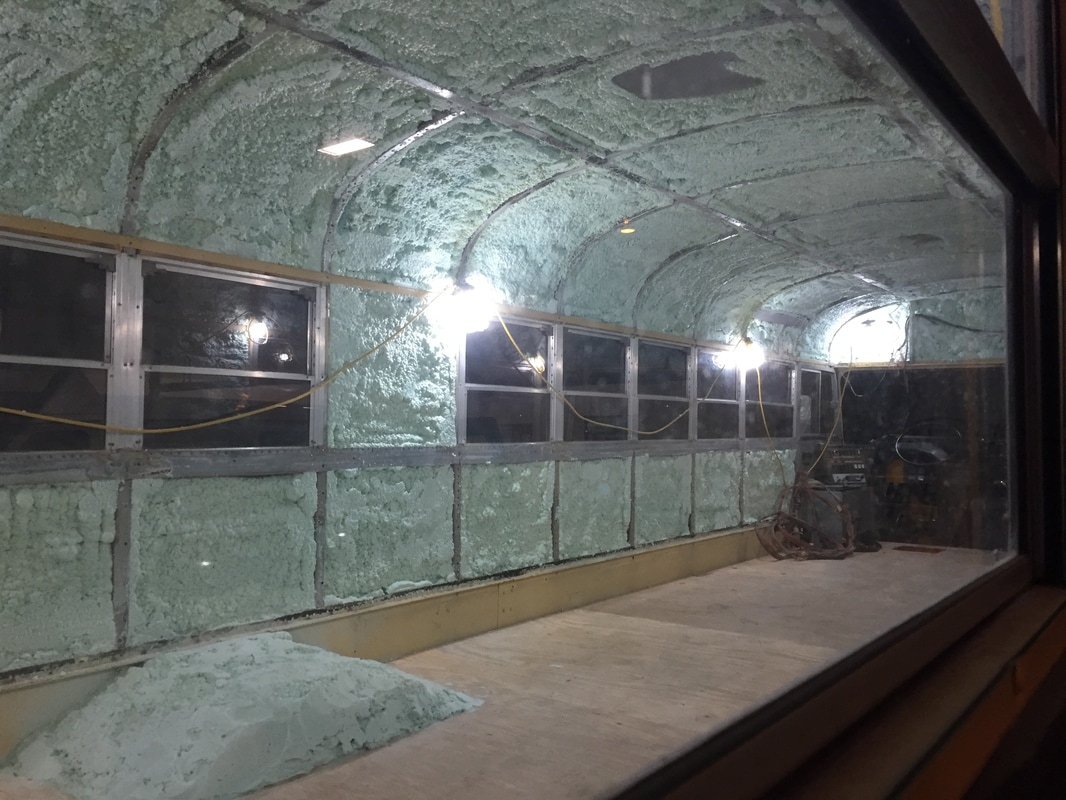 Benefits of spray foam:
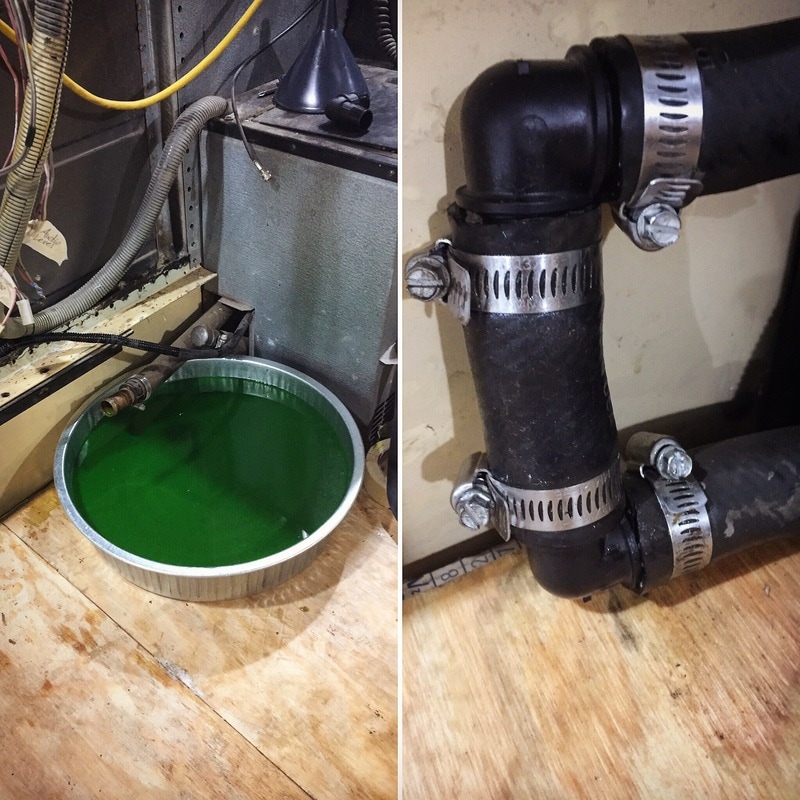 When we bought our bus, the heater boxes past the driver's seat were already removed. We wanted heat in the cab while we were driving, so we kept the heater up front and looped the lines just past it. To drain the lines, we put a 3 gallon pan under where we made our cuts. To loop the lines, we used 3/4" coolant elbows and hose clamps.
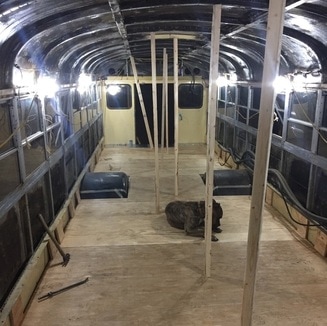
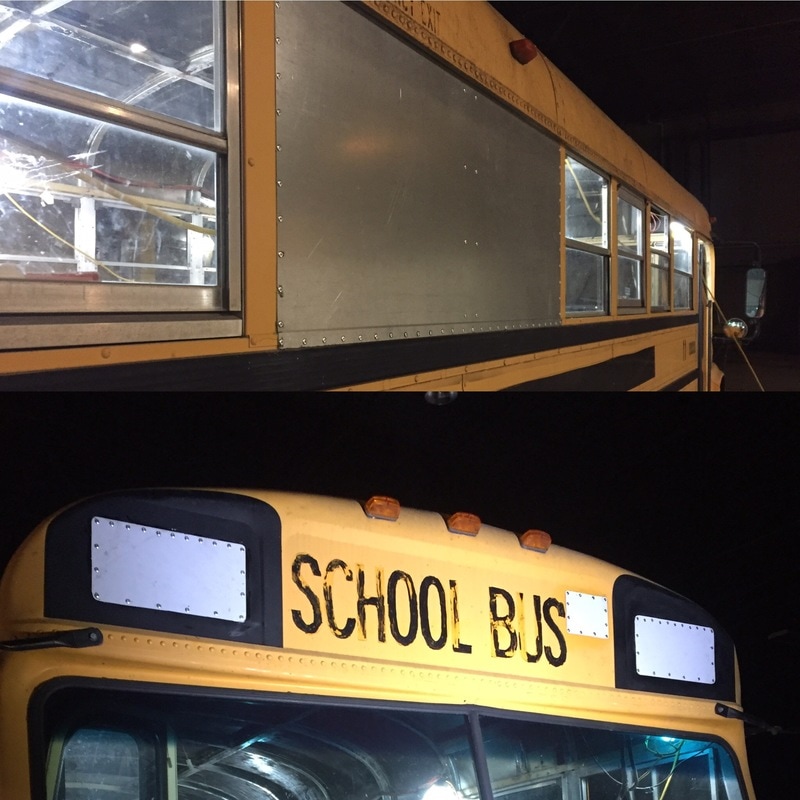 The bus was put on hold during the holiday season, so we were excited to start working on it again. We have changed a few things about the layout but feel like we have a pretty solid plan now and have decided to block in a couple windows where the shower will be, where our closet will be, and the two back windows where our "garage" will be. We also covered the emergency flashers since we weren't going to use them and from what we have gathered, there are some legal issues with having them if the bus is no longer used for commercial purposes.
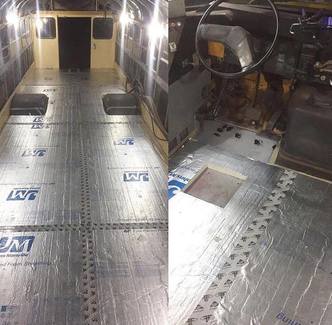
 To attach the sheet metal, we laid out 2" centers on both sides and bottom of each sheet and predrilled 3/16" holes. Then each sheet was lifted and tacked into place with a few self tapping 3/16" screws and then predrilled all the holes in the bus for the rivets. The same method was used to cover the emergency flashers, except we used 22 gage metal. We used a thicker gage metal for the windows because the openings were larger and we didn't want the steel on the sides to look wavy at any point. 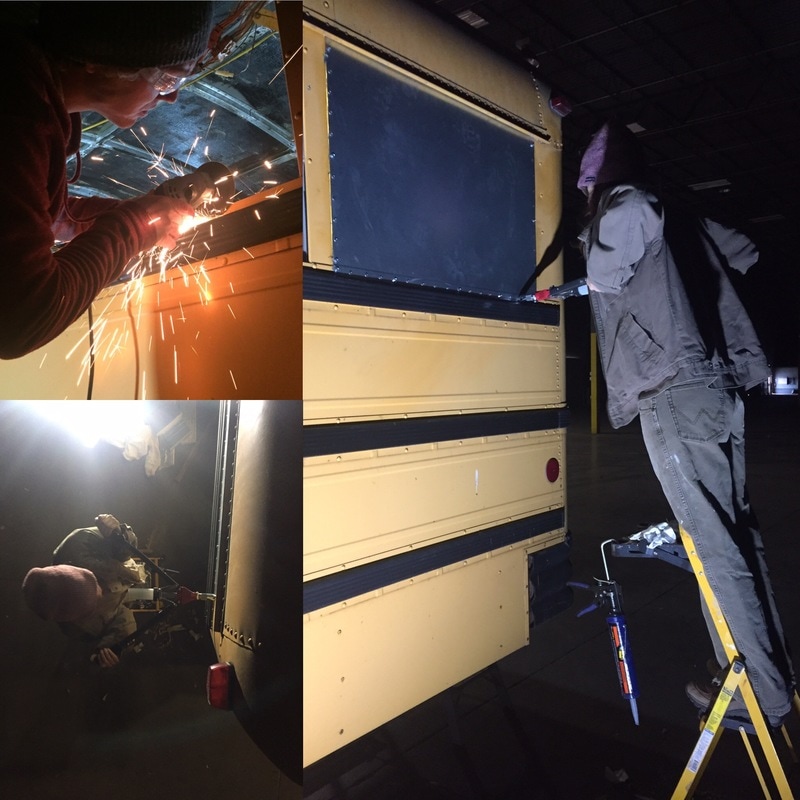 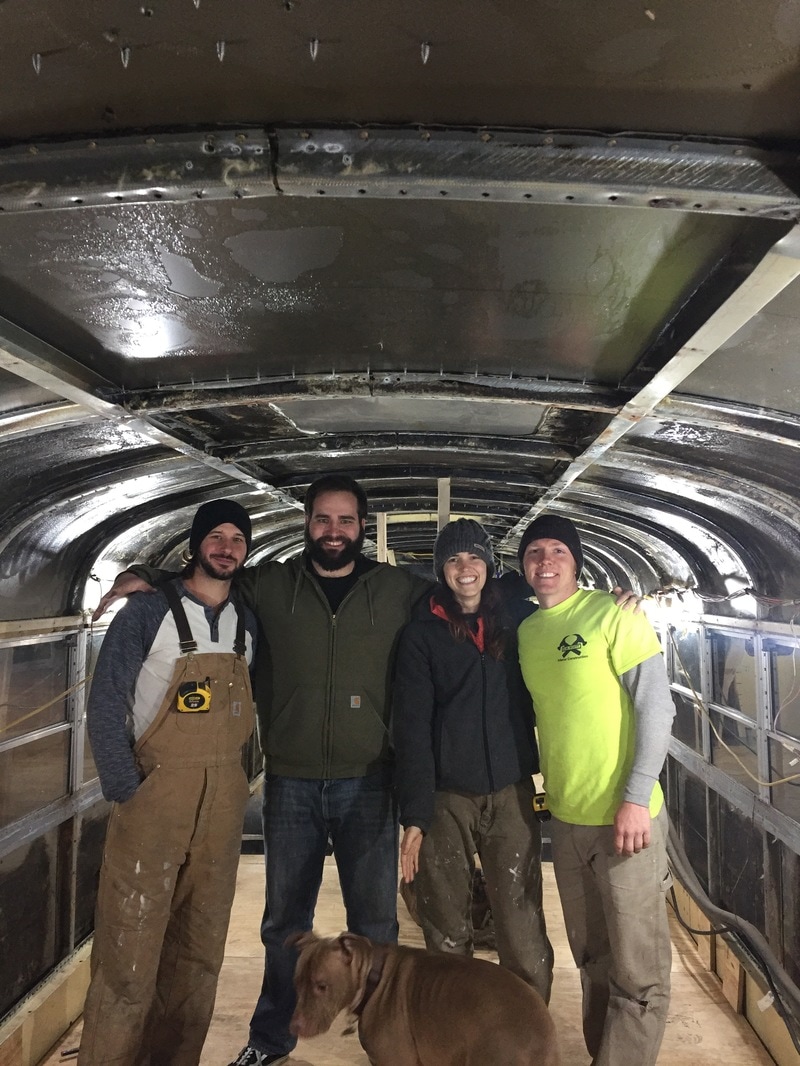 To keep the classic school bus feel, we are keeping most of the windows, and therefore we wanted to insulate as much of the bus as we could because the original windows are not very energy efficient. Matt and I both stand a few inches under 6 feet so we figured we have room to play with. We went with 1.5" polyiso foil faced foam board, giving us an R value of 9.3. The foam has a minimum compressive strength of 16 lbs per square inch. It's moisture, temperature, rot, and air resistant. We used Loctite Pl Proline Adhesive to bond the foam to the freshly swept metal floor of the bus and Georgia Pacific Forcefield Seam Tape to tape the foam pieces together.
Since we went with a frameless floor and are applying our subfloor directly over the foam, we wanted it to be sufficient to withstand any live or dead loads that we would have in our bus. So we used 3/4" tongue and groove plywood as the subfloor. We used the same adhesive for bonding the plywood to the foam as we did for the foam to the metal floor. We used wedge blocks underneath the chair rail to press the plywood down along with some vertical 2 x 3's from roof to subfloor to ensure that the subfloor was lying flat and bonding well to the foam.
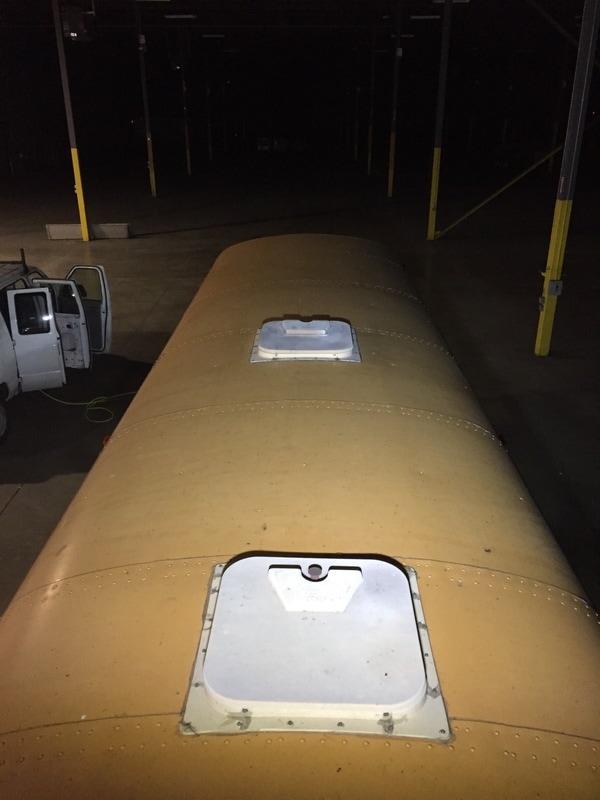
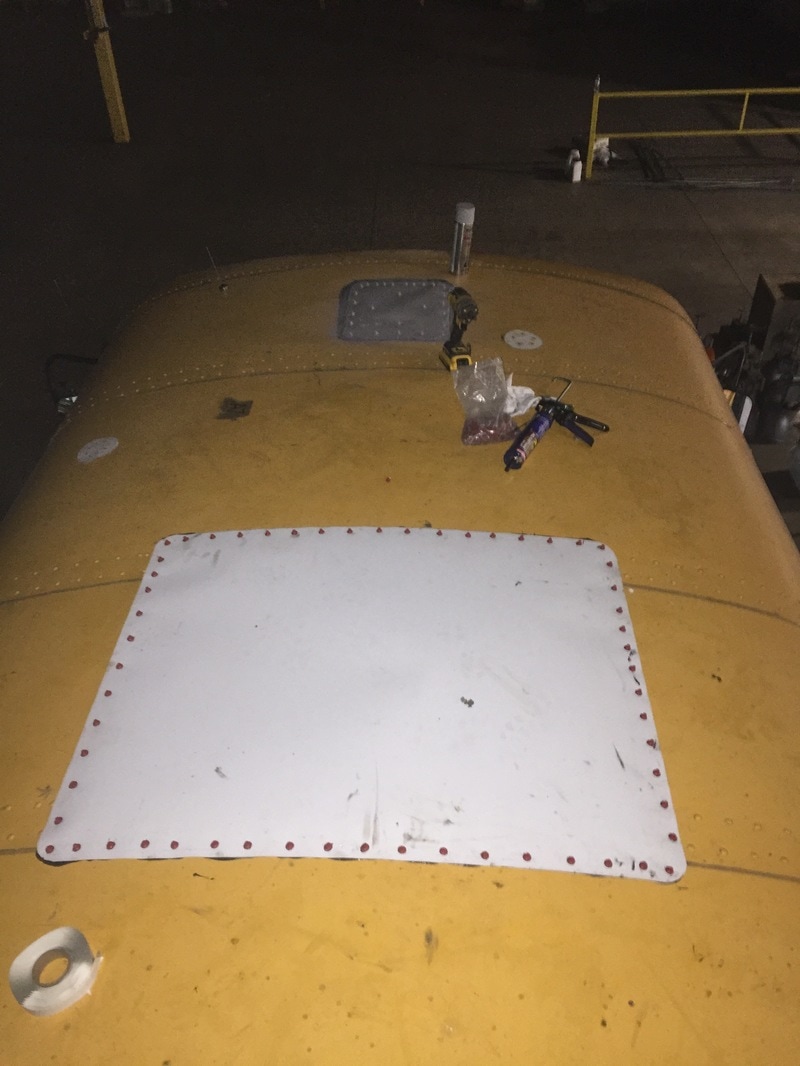
We wanted to remove the emergency roof hatches for two reasons. One being that we needed space for our AC unit and for the Fantastic Vent. The other reason being that they had been leaking at one point and needed repair anyway. The hatches were really easy to remove, just removed the screws and the old sealant that was there. We cleaned the area with rubbing alcohol, applied butyl tape and Pl polyurethane proline sealant for a weatherproof seal. Then we screwed some 22 gage sheet metal down with #12 self-drilling metal to metal screws with bonded washer.
Check out this video to see a quick montage of the process! |
AuthorHey everyone! Archives
September 2018
Categories
All
|

 RSS Feed
