
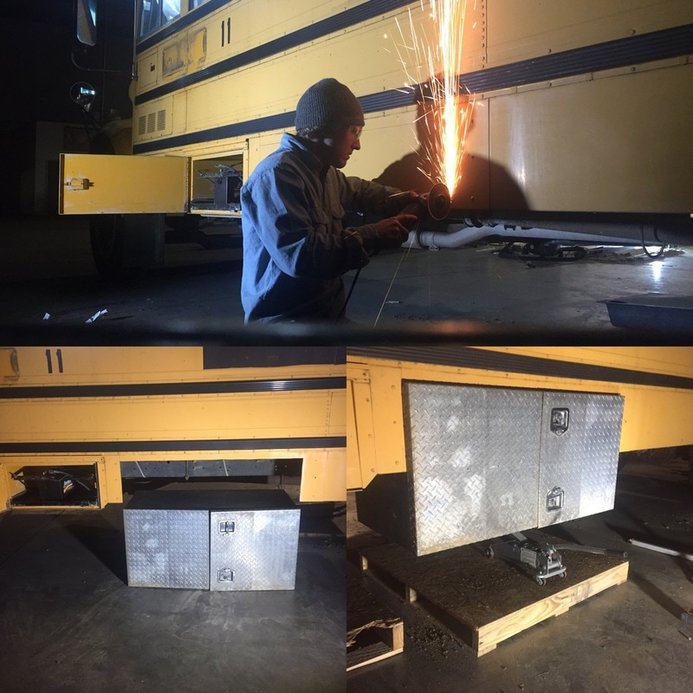
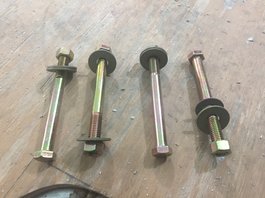
  While we were waiting for our spray foam to be delivered, we had some down time to work on other projects. We found some really good deals on these used tool boxes for extra storage. The aluminum one measures 48''w x 24''h x 24''d on the drivers side and will be used for our solar power battery bank/electrical component storage. The other box is made from steel and measures 72"w x 16"h x 16''d and is located just behind the rear axel on the passenger side. This box will most likely store camping supplies(chairs, cooking utensils, hammock, etc). This process was fairly simple and didn't cost a whole lot of money. We only bought eight 6" Grade 8 Bolts with two washers and a nut for each bolt and used a couple 2" x 3" studs we had laying around as well as some Threadlocker to prevent nuts from vibrating loose. The first thing we did was locate where we wanted them, then assessed weather or not it would work with the structure of the bus. Our bus has a 12" skirt that runs from the front to rear wheels of the bus and is held rigid with gussets extending from the skirt to the underside of a floor joist which had to be removed for the tool boxes to fit in the desired location. To remove the gussets, the rivets attaching them to the floor joist had to be drilled out and pried off. We made the rough opening width a 1/2" wider than the box measurements and made the top cut at the bottom of the floor joist. The aluminum box has doors that open to the side so we either had to make our width opening another 3" bigger or pull the box out to the depth of the doors so that they could fully open. We didn't want the 1.5" gap on each side, so we decided to pull the box out a little. Once the opening was cut and the gussets broke free, we determined where we wanted the bolts to penetrate each box, then pulled that measurement off the outside of the bus and marked the location on the underside of the bus. We used a 3/16" metal bit and predrilled each hole from the underside of the bus. Then came back and drilled the same holes with a 1/2" which was long enough to penetrate through the foam and subfloor inside the bus, giving us the exact location of each bolt. Then we lifted each box into place using a car jack. From the inside of the bus, we could now drill back down through each hole into the box and then use a 1.5" paddle bit on each of the bolt holes drilling down only through the subfloor and foam. This gave an opening big enough for a washer on each bolt and recessed them below the subfloor so there will be no issues with any kind of protrusions in the finished floor. To distribute weight on the bolts holding the boxes, we ran a 2"x3'' studs inside the length of the box; one up front and one in the back. We held each board in place and marked the location of each bolt, then drilled holes accordingly. The lumber was then put into position and capped with a washer and nut. Finishing out the rough opening of each box, a piece of L metal will be riveted over each side of the rough opening to give it a clean look. Since the doors on the aluminum box will sticking out past the side of the bus, the thought of water getting inside the box became a potential issue. The steel box already has a rain guard on the top, so we will be creating our own rain guard on the aluminum box by bending a piece of metal to a Z shape to mount above it. 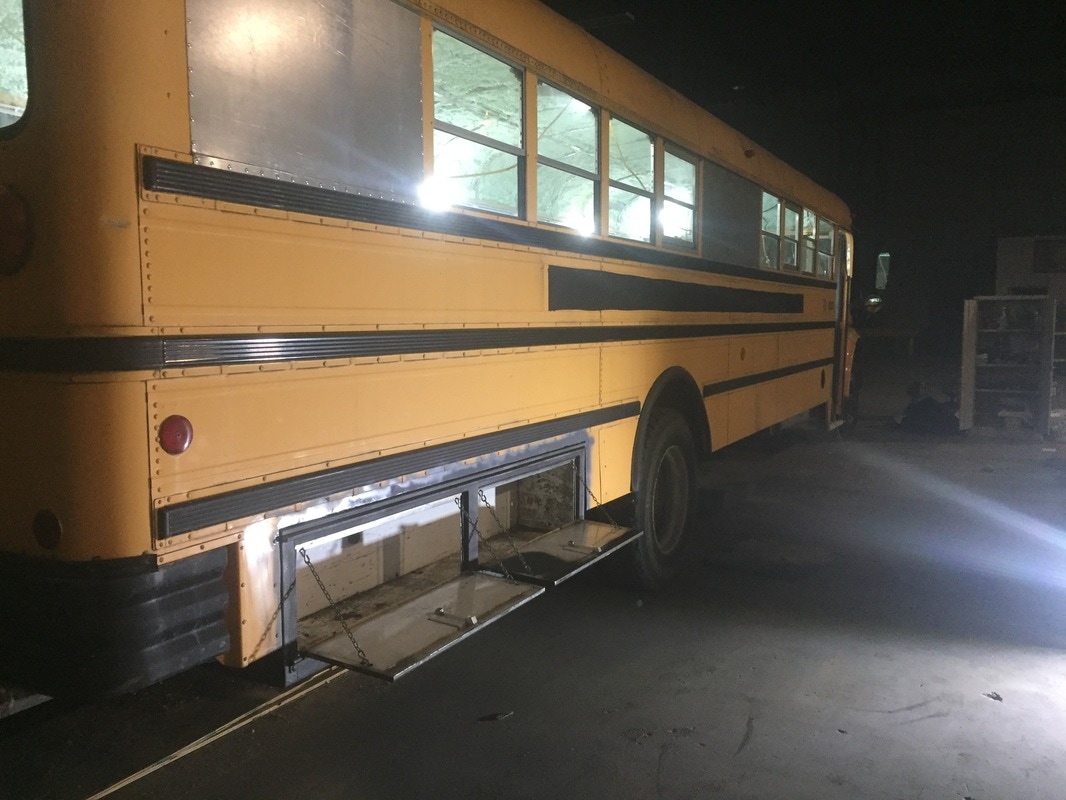
1 Comment
|
AuthorHey everyone! Archives
September 2018
Categories
All
|
 RSS Feed
