
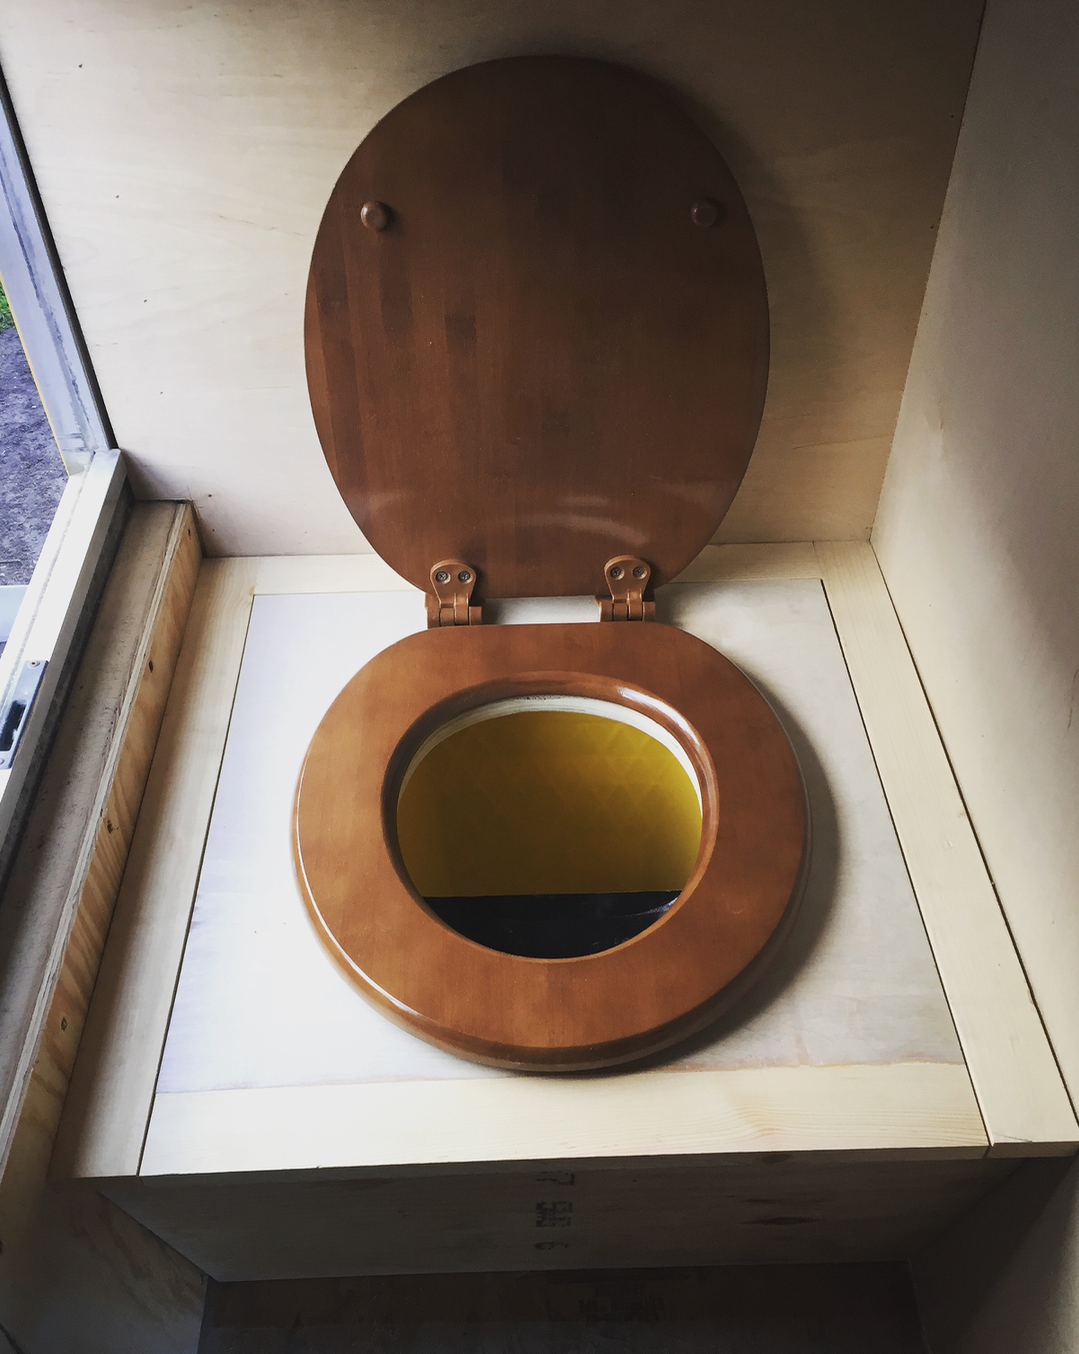
 A composting toilet made sense to us for the sake of conserving water and functionality. We didn't really want to have to deal with a black water tank and from all the research we have done, people have been quite pleased with their composting toilets. Our set up is fairly simple. We have a bucket for the solids and a urine diverter that sends the urine to a holding tank. A 12volt exhaust fan will help draw out any unwanted smells that arise. We originally thought about getting the Nature's Head composting toilet, but just couldn't justify the price. 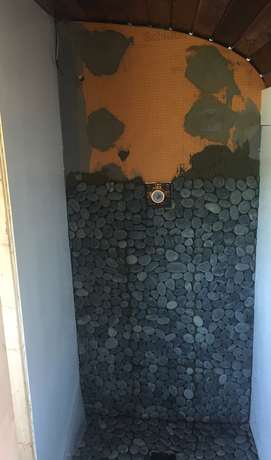 To set the tile, we mixed Ditra-Set and an acrylic additive to strengthen the mortar. After the tile was set, we used Bostik grout with a 425 additive, which also helps improve water resistance of grouts, improves flexural and compressive strengths, and helps prevent cracking in wood framed structures. We sealed the pebbles twice before grouting with a natural stone sealer to prevent the grout from staining. Just a disclaimer about this particular type of tile with large grout lines: IT TAKES FOREVER TO WIPE CLEAN, so work in small areas at a time. We grouted the wall all at once and the floor all at once and it was a race against time to get an area clean before it set up. For the bathroom area, we utilized every nook and cranny that we could. We didn't want the bathroom sink inside the bathroom because we thought it would feel to cramped. So we came up with this design to put the sink on the outside wall with storage below and on the side. The side wall and the rest of the bathroom interior is 100% vinyl since it will most likely get wet from the shower. For privacy, an old farmhouse door is being installed on drawer slides. We wanted to use a barn door rail but we didn't have the clearance. Our tiny sink pictured was from Signature Hardware. 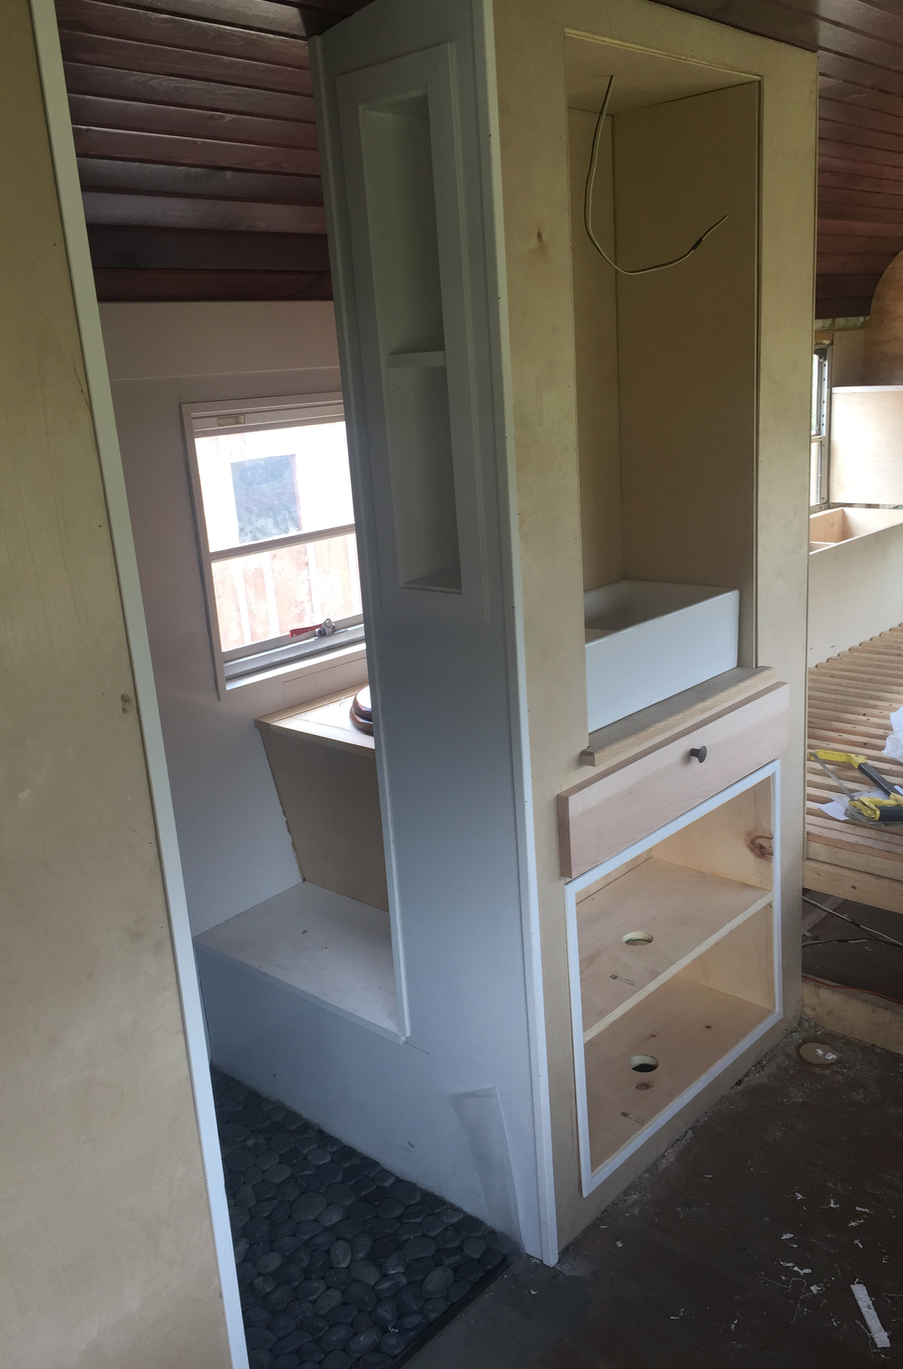
0 Comments
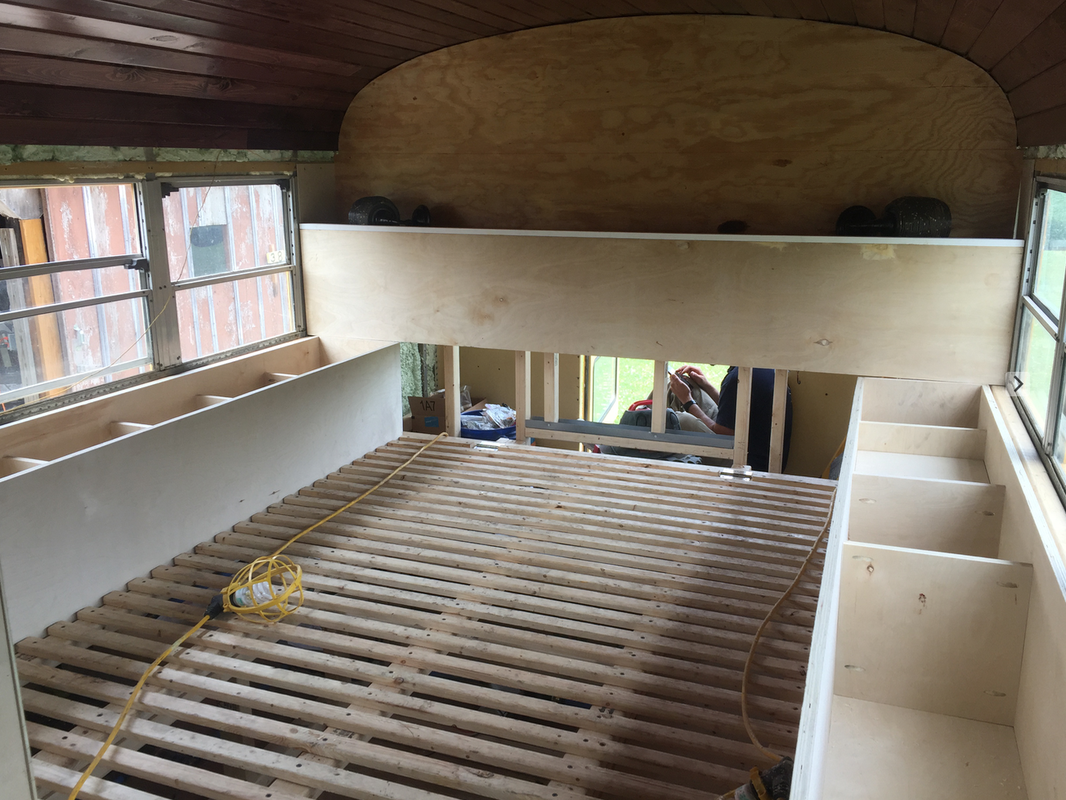 Our bedroom layout needed to be cozy, yet functional for storage. So we decided to have some storage on the headboard wall, as well as cubbies on either side of the bed. The side cubbies will most likely be used for clothes and bedside necessities. All of the cubbies are built from 3/4" birch and Kreg Jig joinery. We used the Kreg Jig for multiple applications in our build out, so it ended up being an extremely useful tool to have. Our bed side cubbies will have lift up lids while our head board cubbies will have bypassing doors using dado rails. Beth made these sconces for the headboard wall with candle holders from Target and a sconce kit at Lowe's.   As our time came to end at the warehouse we were getting worried about where we would move the bus. A soon to be friend of ours has a farm just outside of town and offered us to bring the bus there and we took her up on it. Being out at the farm has made a huge difference in our work ethic- it's so much more pleasant being outside with natural light while working. I feel like we have progressed 10x faster in this new environment. The owner of the farm is a retired school teacher who is always working on some kind of cool project so we offered up our time whenever she needed a hand in exchange for having the bus at the farm.
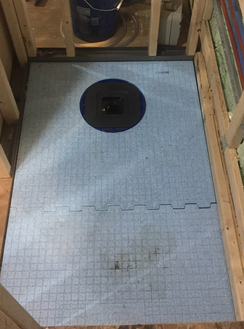
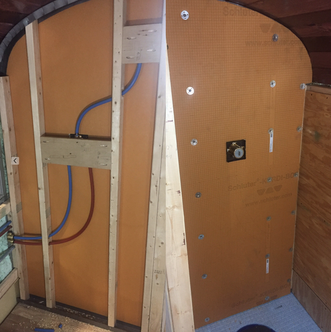
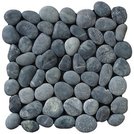 We decided to go with pebble tile for two of the shower surfaces, the floor and mixing valve wall for a spa-like feel. The other wall surfaces will be glue up shower surround. We used two different systems for our tile substrate. The floor is a pre-sloped shower pan made by USG Durock which needs to be water proofed later on. Video on Durock installation here. The wall is a product by Schluter caller Kerdi Board. This 1/2" foam board is 100% waterproof as is but needs to be patched if any penetrations are made. A product called Kerdi Fix was used to adhere the foam to the studs and also special teethed washers were screwed through the face.
|
AuthorHey everyone! Archives
September 2018
Categories
All
|
 RSS Feed
