
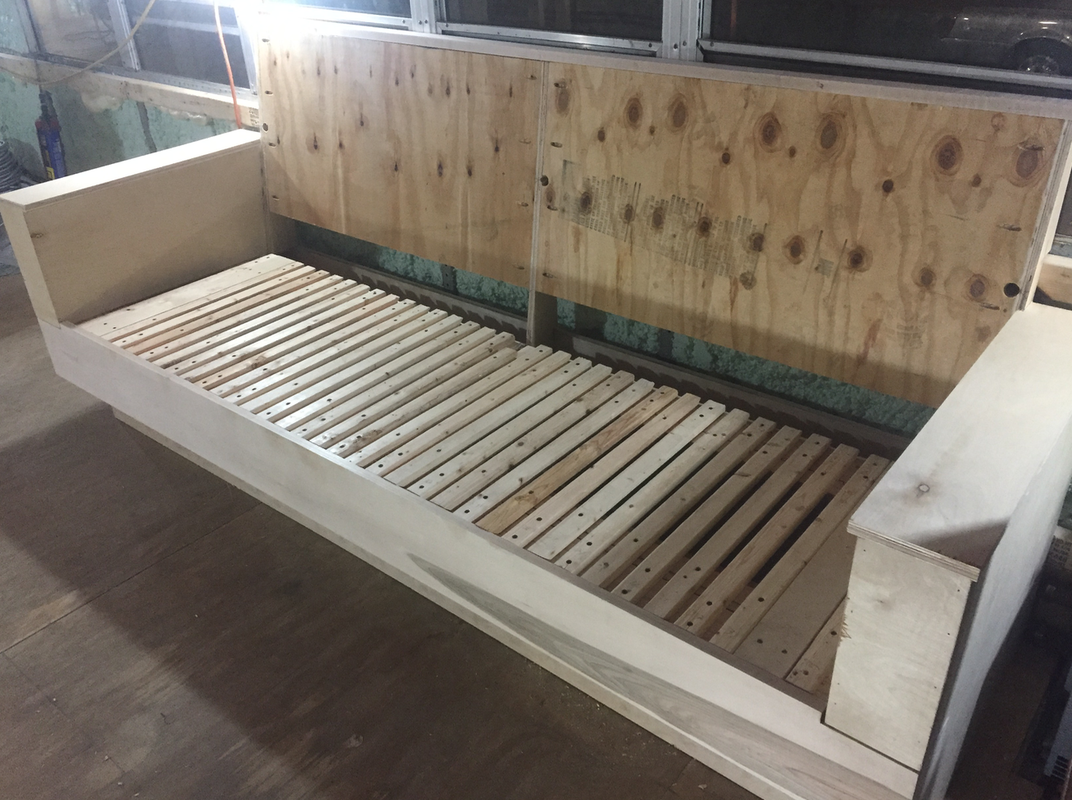
  This was super fun to see once it was built. There's a piece of furniture in our bus! Matt designed and built it with a touch of mid century modern in mind because we plan on using some of our current decor in the bus eventually. We have this super cool lamp that will go on a floating shelf next to the sofa. We wanted a place for guests to sleep but also to function as our entertainment space. We also decided we wanted to store our battery bank inside the bus away from the outside elements. With that in mind, we needed the couch to have three purposes: a sofa, a bed, and provide storage. A rough sketch was drawn then the cutting began. The carcass was cut from 3/4" sheets of birch. The front rail, arm rest, and top rail are cut from maple. The armrest functions as storage with each top being hinged with full overlay hardware. The back rail of the couch seat is stationary from front to back but is hinged up and down. We attached every other 1x2 to the back rail with screws. We did the same process to the front rail, keeping all the 1x's spaced evenly using an upright 1x as a spacer. The slats that are fixed to the front rail were then fastened on the back to a 1x that sat just in front of the back rail on the underside. This proccess is a bit tricky to explain but not that hard to build. 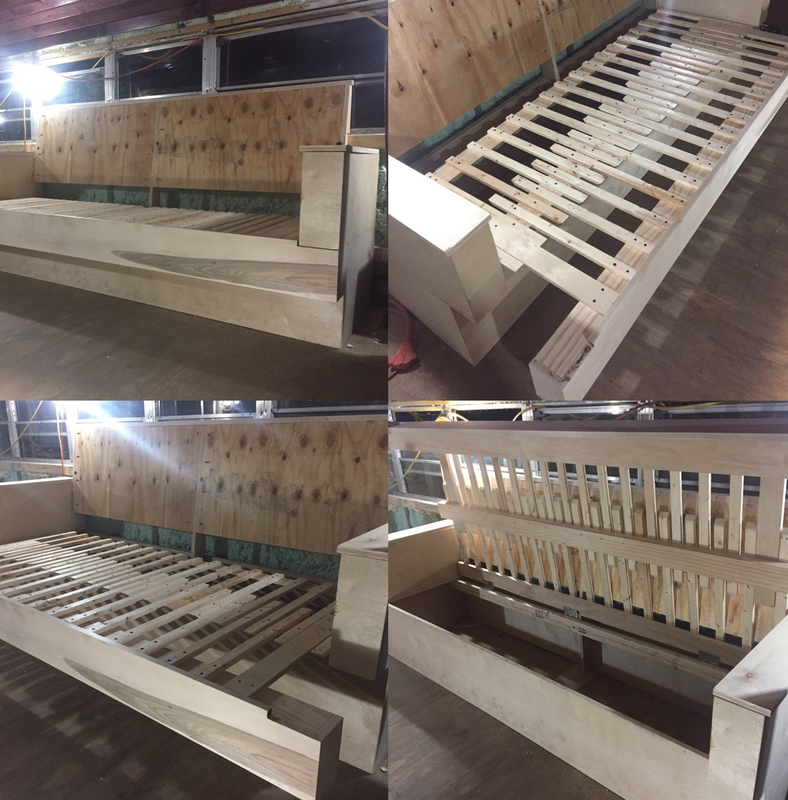
0 Comments
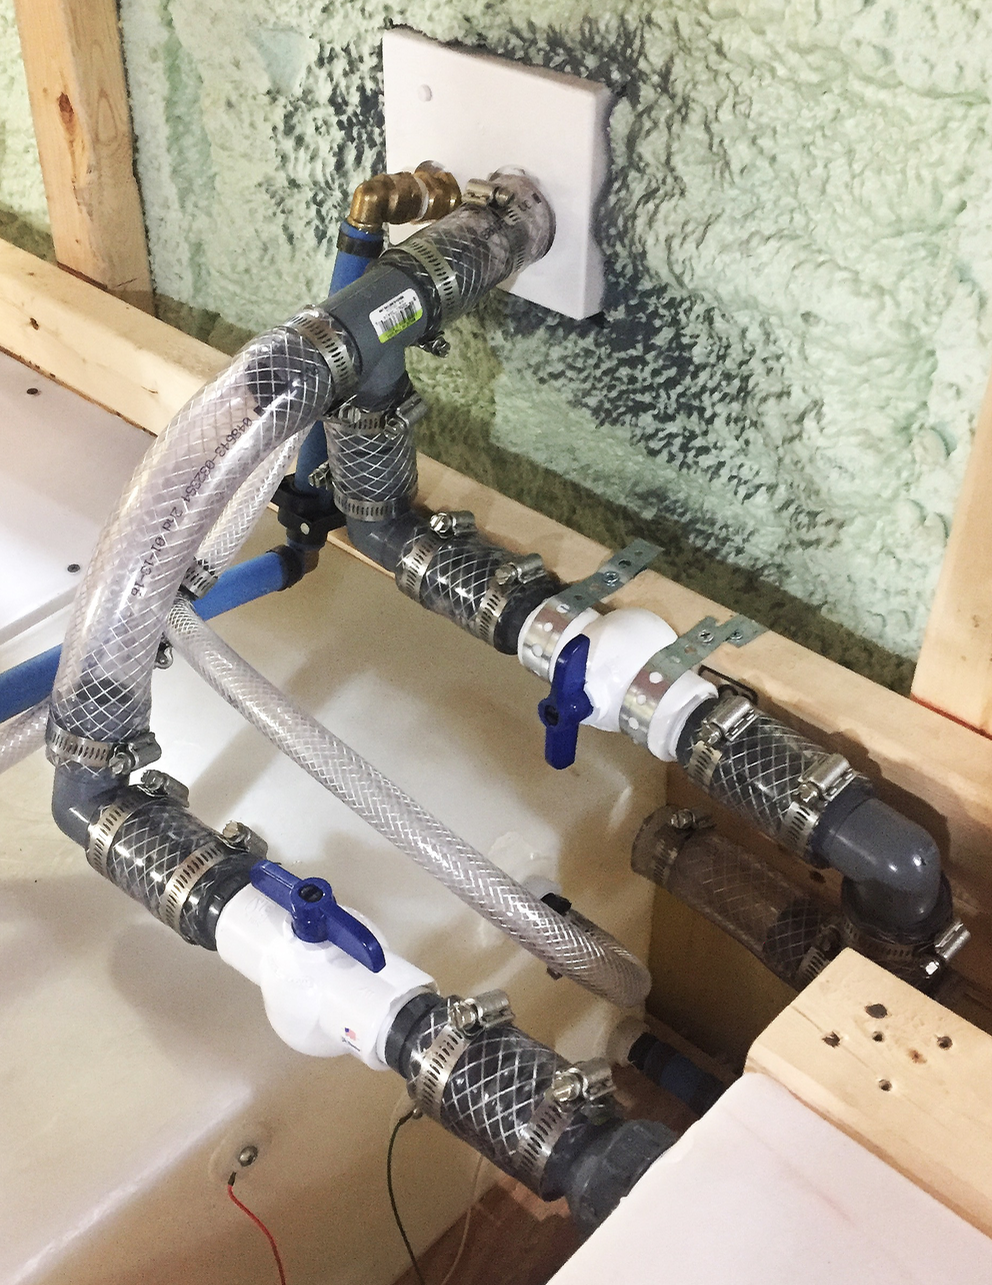
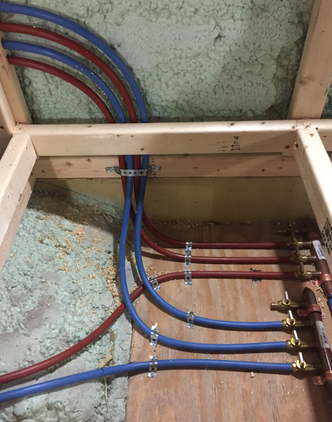
Our plumbing is not done as of this point but we are close. From the beginning of our system, we have a two-way fill valve with a locking door. Right now we can either connect a water supply directly to our lines (city fill), or just fill up our fresh water tanks through the gravity fill port. If connected to the city fill side, the water bypasses the water pump and Ts directly to a four-way manifold then to the cold water fixtures, or to the hot water heater, then through a four-way manifold followed by the hot water fixtures. All of the water supply lines in the bus are piped with PEX and connections made with quick connect or crimp fittings.
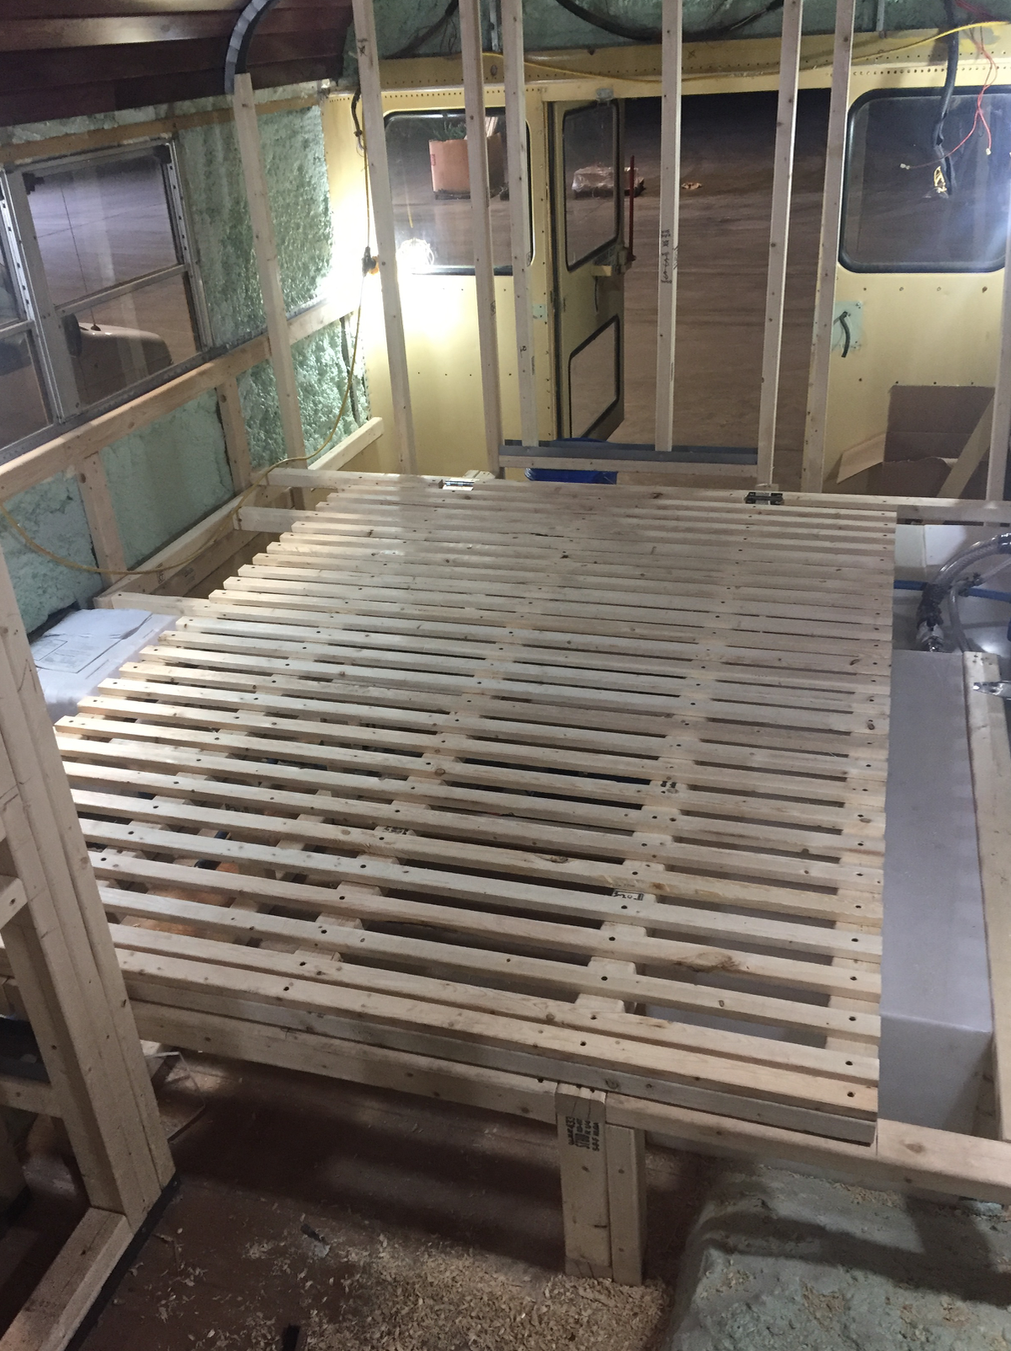
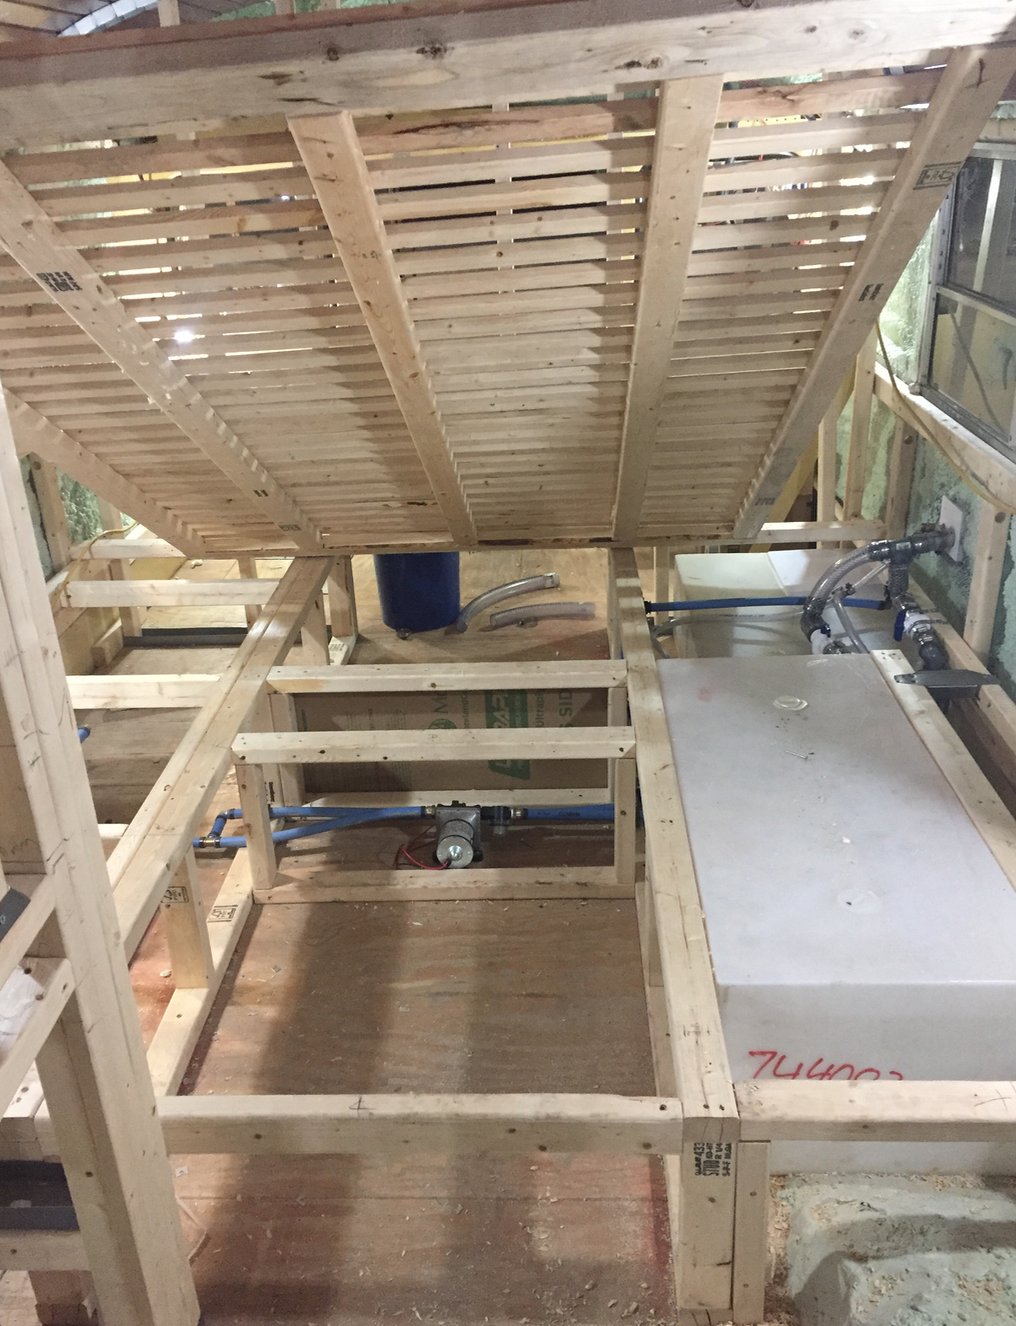
If we are using the gravity fill to top of our fresh water tanks then the system begins with vinyl tubbing to shut of valves. We have 1/4 turn shut of valves for both tanks. This allows us to control which tank we want to feed water into. Both tanks have a vent line at the top that allow air to exit the tank as water is being displaced to avoid the chugging effect. At the bottom of each tank, water lines run to our Surflo water pump that then meets up at the same T as the city fill branching either to the cold manifold or hot water heater. Our water pump has a built in check valve which prevents a back flow through system if were hooked up to the city fill. We have three drains, plus our urine diverter which ties into our vanity waste line. There are two sinks plus a shower which all tie together and go to our holding tanks. To support our holding tanks, we used threaded rod and unistrut. The rod was cut to desired length then holes were drilled into existing steel beams under the bus. The rod was then fed through each hole and secured with nuts washers split washers and the same on the other side of the beam. A height was then determined for where the tanks would be held. Then more nuts and washers were used before sliding unistrut to that height then our holding tanks followed by another unistrut with nuts and bolts. Flat stock steel was then attached on the out side edge connecting both top and bottom struts to help hold them true. 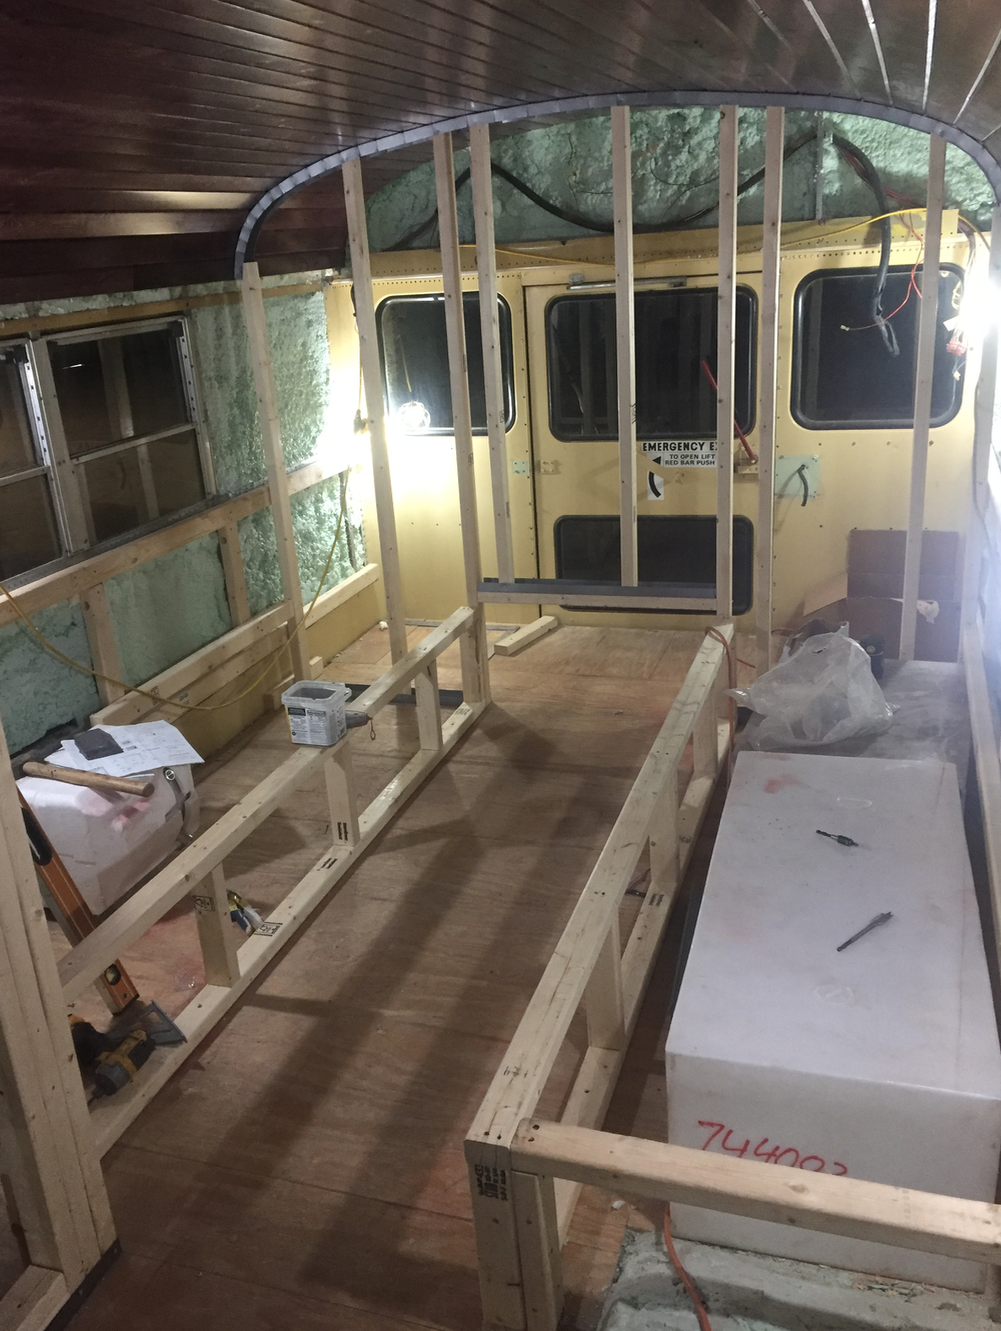 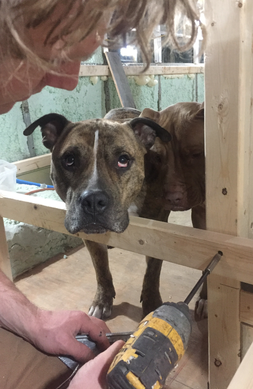 Framing the bedroom was fairly simple- just used the same materials as we did for the bathroom. We did have to account for the fresh water tanks and hot water heater which will be underneath the mattress. One of our fresh water tanks is 45 gallons, the other is 35 gallons. Plenty of water for us! Our hot water heater, on the other hand, is only 6 gallons, so we will definitely have some adjusting to do there- quick showers only! <The dogs love to watch what loud tools we using, haha! The hot water heater is not currently completely installed but we have the hole cut for the access panel on the outside. Access to the fresh water tanks is mounted outside the bus as well so we can either use a gravity fill or just fill up at a fill up station and use the water pump. There is a lock on this access panel so no one can sneak into our water supply. Our water tanks have an electric sensor on them so when the water gets to a certain level, it notifies us so we don't run out without knowing. We will also have access to the shut off valves for these tanks within one of the cubbies on the side of the bed. More details on that in the next post. We used a slatted design using 1 x 2's for our bed frame because we wanted to keep it fairly light weight (we will later put gas shocks on the "lid" to make it more easily assessable), and also to let air circulate through the mattress. You can see in the right picture access to the water pump and in front of that will just be extra storage, most likely for seasonal clothes/supplies.
|
AuthorHey everyone! Archives
September 2018
Categories
All
|
 RSS Feed
