
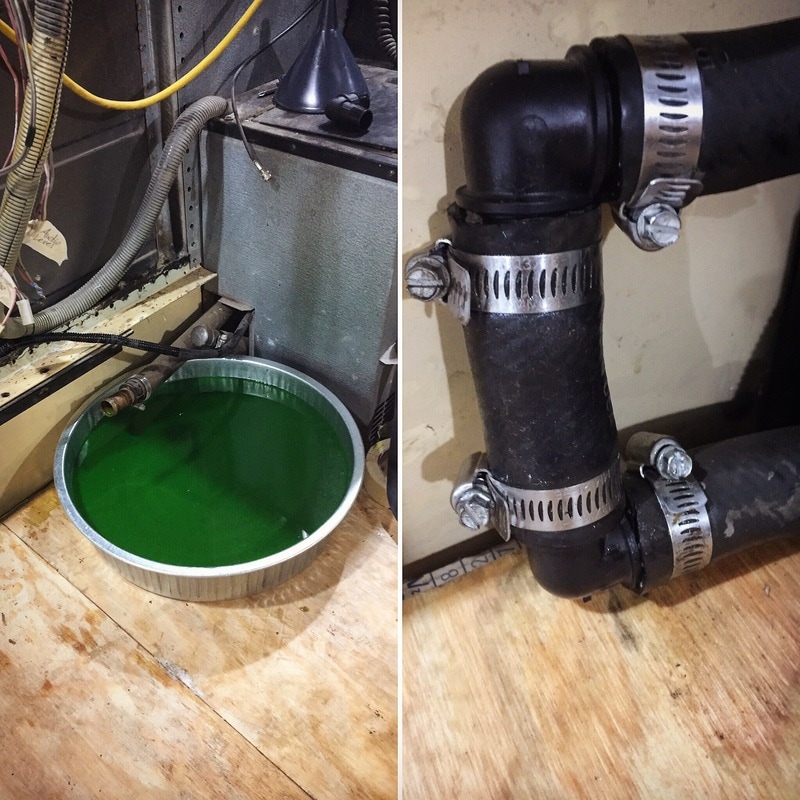
 When we bought our bus, the heater boxes past the driver's seat were already removed. We wanted heat in the cab while we were driving, so we kept the heater up front and looped the lines just past it. To drain the lines, we put a 3 gallon pan under where we made our cuts. To loop the lines, we used 3/4" coolant elbows and hose clamps.
0 Comments
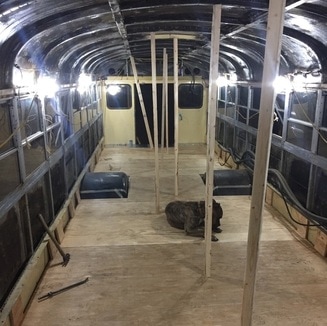
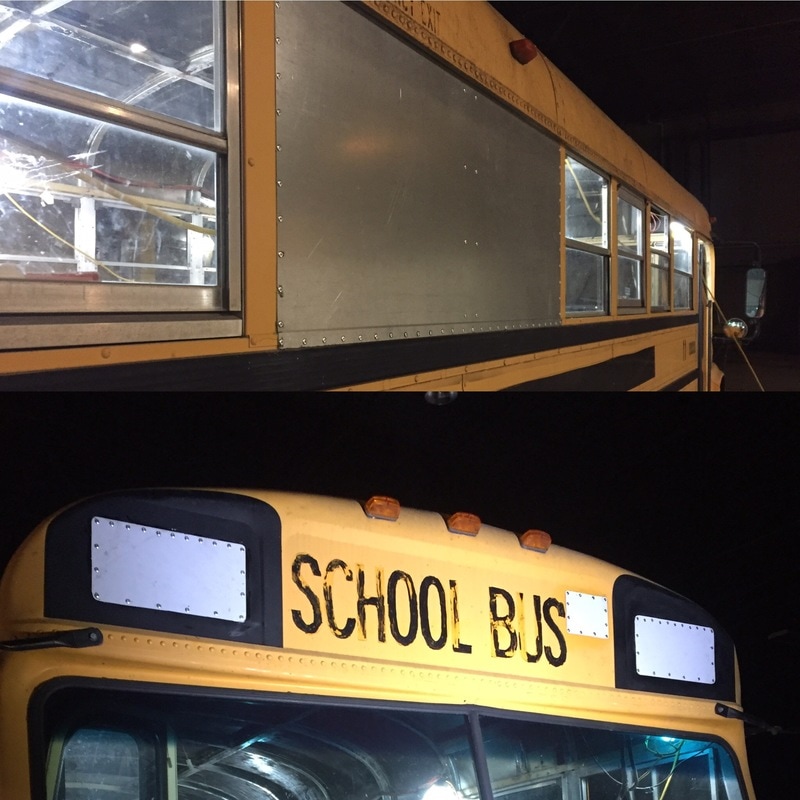 The bus was put on hold during the holiday season, so we were excited to start working on it again. We have changed a few things about the layout but feel like we have a pretty solid plan now and have decided to block in a couple windows where the shower will be, where our closet will be, and the two back windows where our "garage" will be. We also covered the emergency flashers since we weren't going to use them and from what we have gathered, there are some legal issues with having them if the bus is no longer used for commercial purposes.
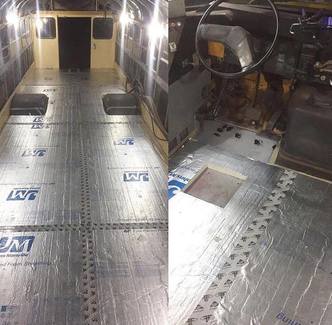
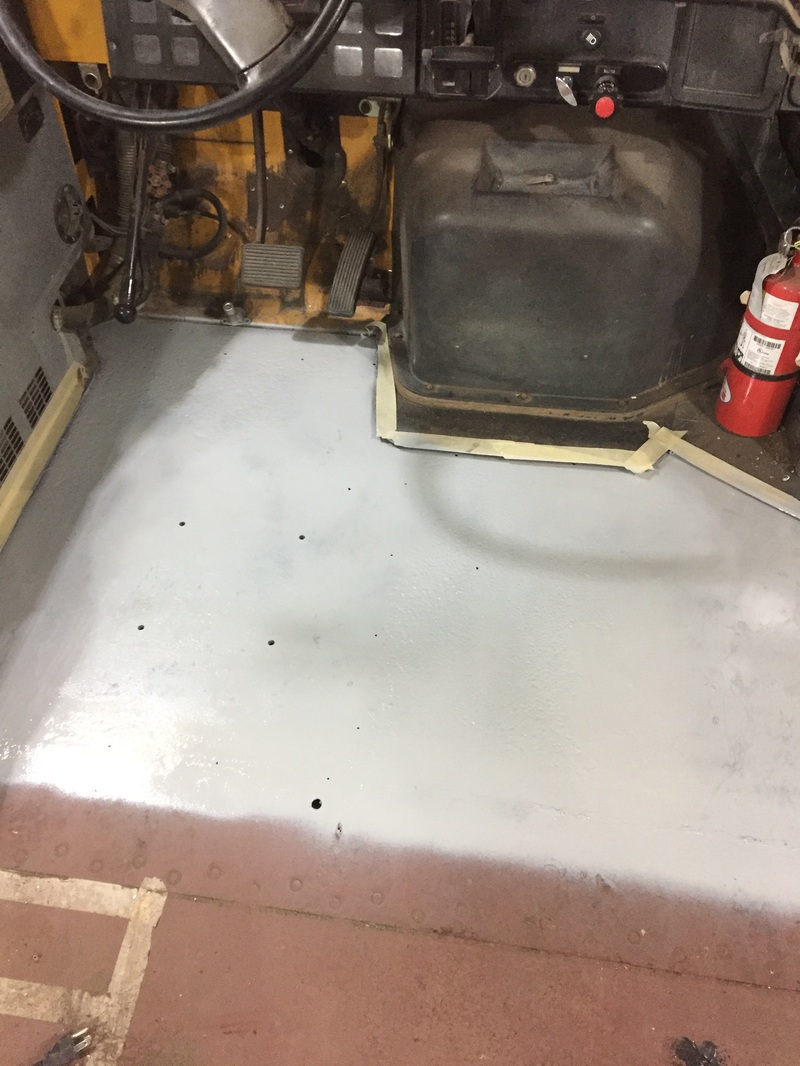
 To attach the sheet metal, we laid out 2" centers on both sides and bottom of each sheet and predrilled 3/16" holes. Then each sheet was lifted and tacked into place with a few self tapping 3/16" screws and then predrilled all the holes in the bus for the rivets. The same method was used to cover the emergency flashers, except we used 22 gage metal. We used a thicker gage metal for the windows because the openings were larger and we didn't want the steel on the sides to look wavy at any point. 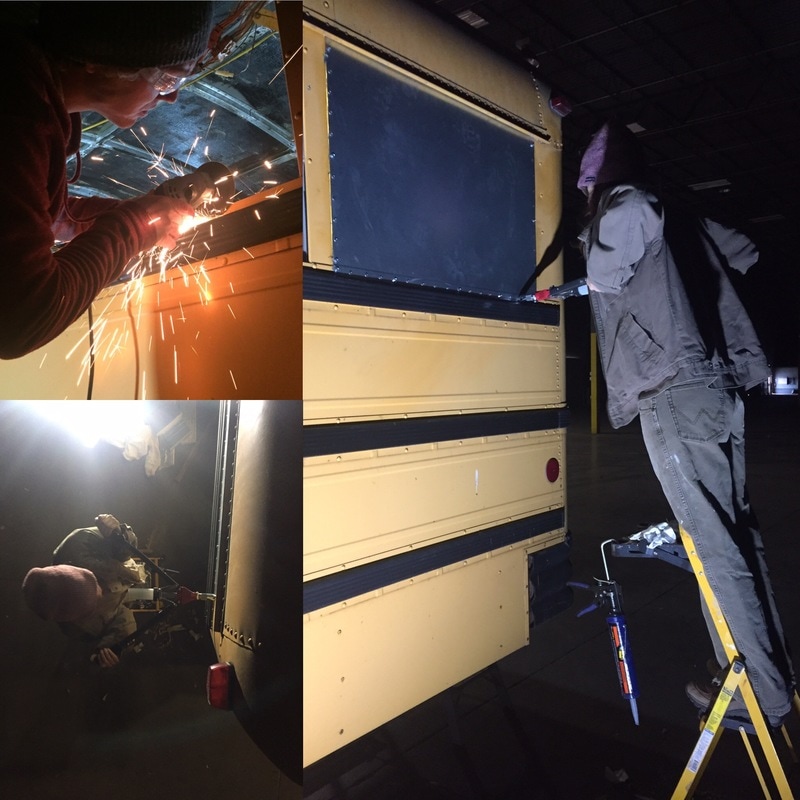  To keep the classic school bus feel, we are keeping most of the windows, and therefore we wanted to insulate as much of the bus as we could because the original windows are not very energy efficient. Matt and I both stand a few inches under 6 feet so we figured we have room to play with. We went with 1.5" polyiso foil faced foam board, giving us an R value of 9.3. The foam has a minimum compressive strength of 16 lbs per square inch. It's moisture, temperature, rot, and air resistant. We used Loctite Pl Proline Adhesive to bond the foam to the freshly swept metal floor of the bus and Georgia Pacific Forcefield Seam Tape to tape the foam pieces together.
Since we went with a frameless floor and are applying our subfloor directly over the foam, we wanted it to be sufficient to withstand any live or dead loads that we would have in our bus. So we used 3/4" tongue and groove plywood as the subfloor. We used the same adhesive for bonding the plywood to the foam as we did for the foam to the metal floor. We used wedge blocks underneath the chair rail to press the plywood down along with some vertical 2 x 3's from roof to subfloor to ensure that the subfloor was lying flat and bonding well to the foam.
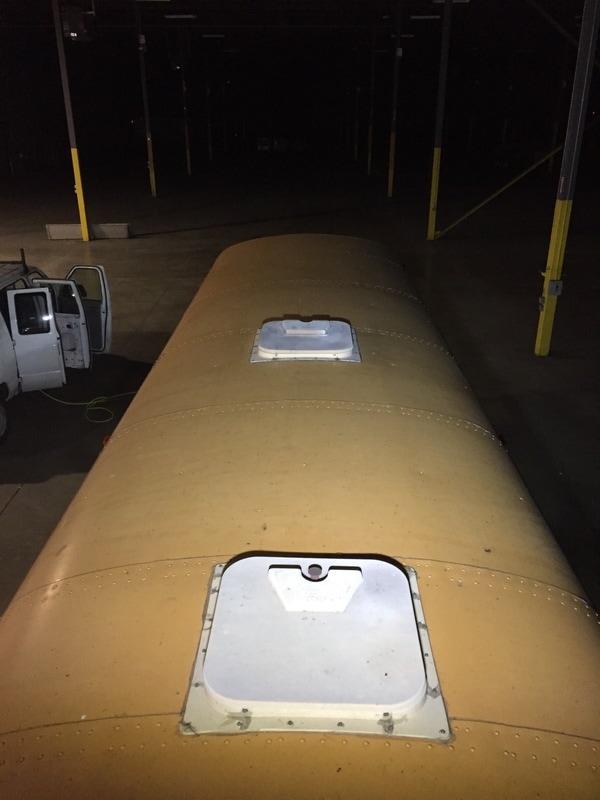
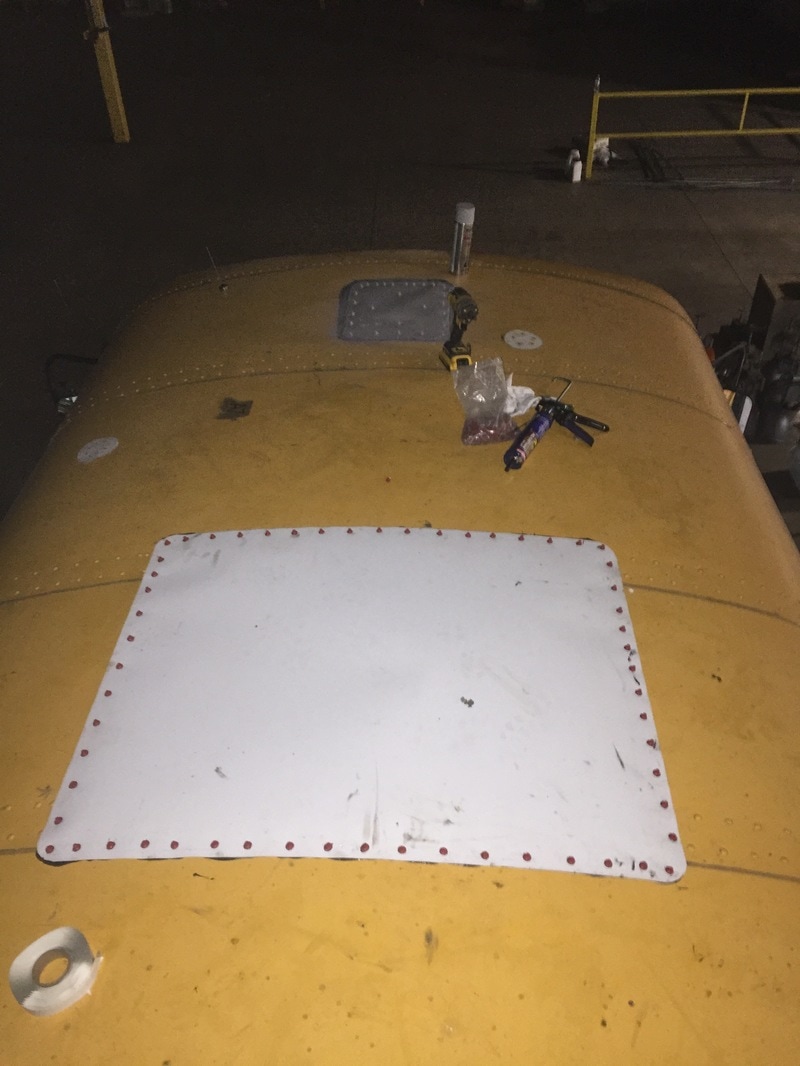
We wanted to remove the emergency roof hatches for two reasons. One being that we needed space for our AC unit and for the Fantastic Vent. The other reason being that they had been leaking at one point and needed repair anyway. The hatches were really easy to remove, just removed the screws and the old sealant that was there. We cleaned the area with rubbing alcohol, applied butyl tape and Pl polyurethane proline sealant for a weatherproof seal. Then we screwed some 22 gage sheet metal down with #12 self-drilling metal to metal screws with bonded washer.
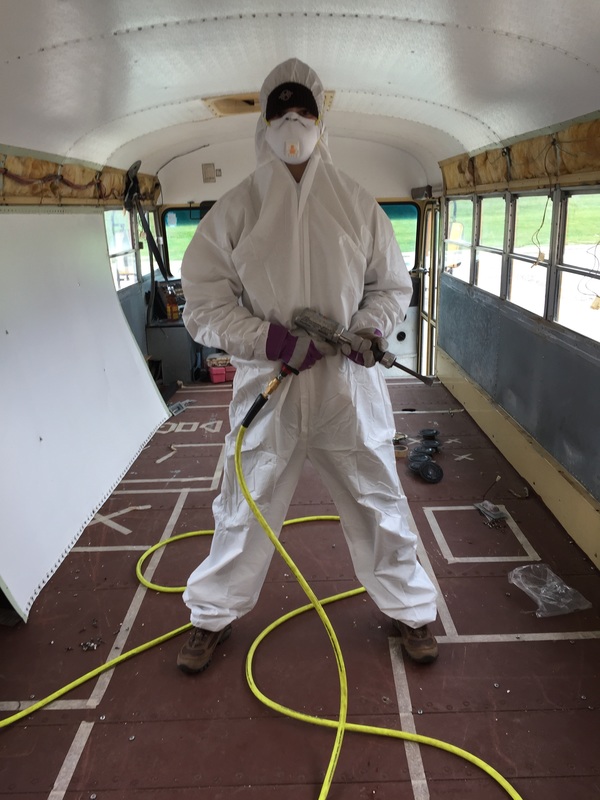
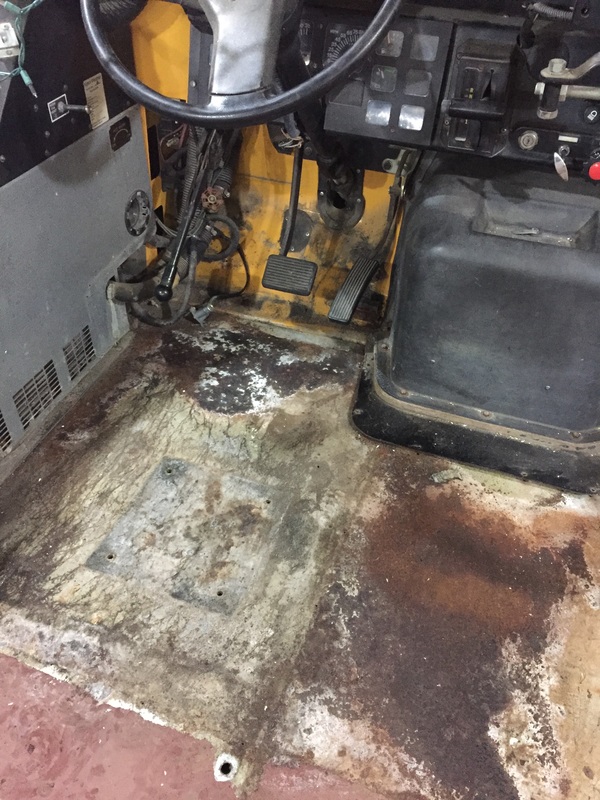
Check out this video to see a quick montage of the process! So it's been almost a month since our last post and we have made lots of ground on the demo. Once we had all the ceiling wall/ceiling panels down it was time to remove all the lovely fiber glass insulation. The insulation was held in place with some kind of adhesive which kept a lot of insulation fibers stuck to the metal. Since we are spraying our foam insulation directly to the ceiling and walls we wanted to go the extra mile for a clean surface. We used a wire brush head on the grinder and removed the rest of the remaining fiberglass. It's always a good idea to wear a mask, suit, and eye protection when dealing with insulation to avoid itchy skin. We removed the driver's seat and pealed up the rubber floor below it and discovered some rust. It wasn't rusted all the way through the floor so we treated it with Ospho. Here are the steps to treat the rust:
*Make sure to wear proper respirator when removing rust and have good ventilation* The emergency roof hatches have been removed which was fairly easy but removing the sealant underneath there flanges did take a little time. The openings on our bus will be downsized with sheet metal so we scraped and sanded the area down so theres a clean surface to adhere new sealant under the metal panels. The front warning flashers have also been removed and will be covered and sealed with sheet metal. We are rewiring our rear warning lights, the reds will be additional break lights and the ambers will be additional turn signals.
  Matt and I decided to take down the ceiling panels as well as side panels and remove the old fiberglass insulation and replace it with a closed cell foam. We decided to go this route because we didn't know what kind of shape the old insulation was in and didn't want to risk something happening while we were on the road. This also allowed us to inspect the condition of the metal on the ceiling, which we actually discovered a good chunk a soaking wet insulation from a leaking emergency exit hatch. The foam will give us better sound dampening and an R value (insulation rating) of 6 to 6.5 per inch. Our first thought was to use a metal grinder and grind them all off, but it wasn't efficient on the 1/2 inch rivets. We tried a few other methods and after about 4 hours of trying different methods and researching and asking friends questions, we found that using a heavy duty pneumatic hammer with a punch head was very effective in removing the pins and then switching out to a 3/4 inch chisel head to take off the heads. In about 5 hours, we got the entire ceiling removed and fiberglass insulation taken out. 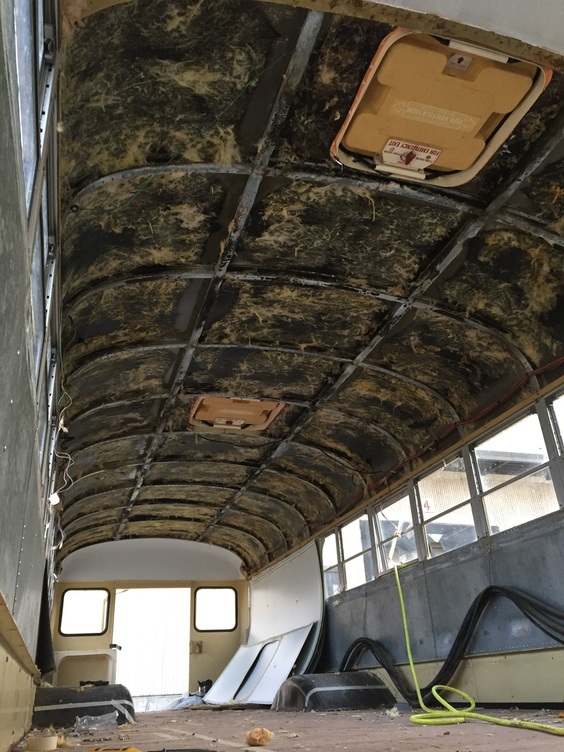 Now that we had made the initial move on buying a bus, we realized that this is really happening. We are going to live in a bus. And it's gonna be awesome. It's pretty small, but it's also pretty big. We knew that there was plenty of space to fit all of our belongings in, it just became of question of where exactly will we put our bikes? Our water tanks, generator, etc.? It was fun to come up with all these ideas of where to store our stuff. To challenge ourselves on what would be wasted space and what we could turn into useful space. So we bought some masking tape and taped off how big we wanted our "garage." We figured we would want this to be large enough to fit our bikes, camping gear, and generator, but wanted to keep the inside of the bus as spacious as possible. So we allowed ourselves about 28 inches of garage space, starting at the back end of the bus. Then we figured our queen sized bed would be on the other side of that wall, on a platform so we can have storage underneath. We played around with a lot of different toilet/shower layouts, but found the best option was to put the toilet over one wheel well and the bathroom sink over the other wheel well. The shower would be next to the sink and that way, we would be able to maximize our kitchen and living room space. We figured we could have kitchen cabinets and counter space on both sides of the bus and still have room for a loveseat and chair with storage underneath and eating table that also functions as a dog crate. It's possible that our layout could change once we really get in the grove of things, but we plan on keeping it as close to this as possible. 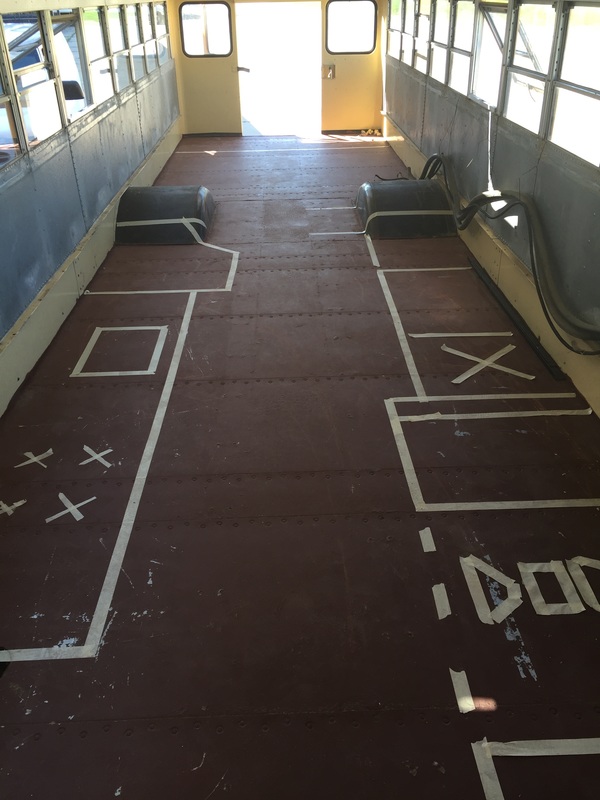 |
AuthorHey everyone! Archives
September 2018
Categories
All
|

 RSS Feed
