
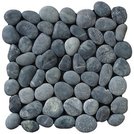
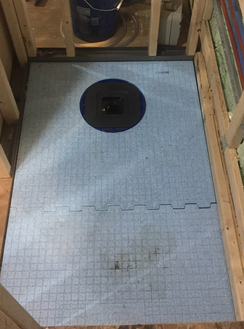
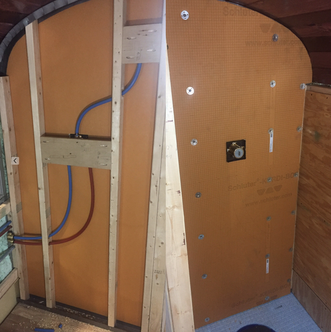
 We decided to go with pebble tile for two of the shower surfaces, the floor and mixing valve wall for a spa-like feel. The other wall surfaces will be glue up shower surround. We used two different systems for our tile substrate. The floor is a pre-sloped shower pan made by USG Durock which needs to be water proofed later on. Video on Durock installation here. The wall is a product by Schluter caller Kerdi Board. This 1/2" foam board is 100% waterproof as is but needs to be patched if any penetrations are made. A product called Kerdi Fix was used to adhere the foam to the studs and also special teethed washers were screwed through the face.
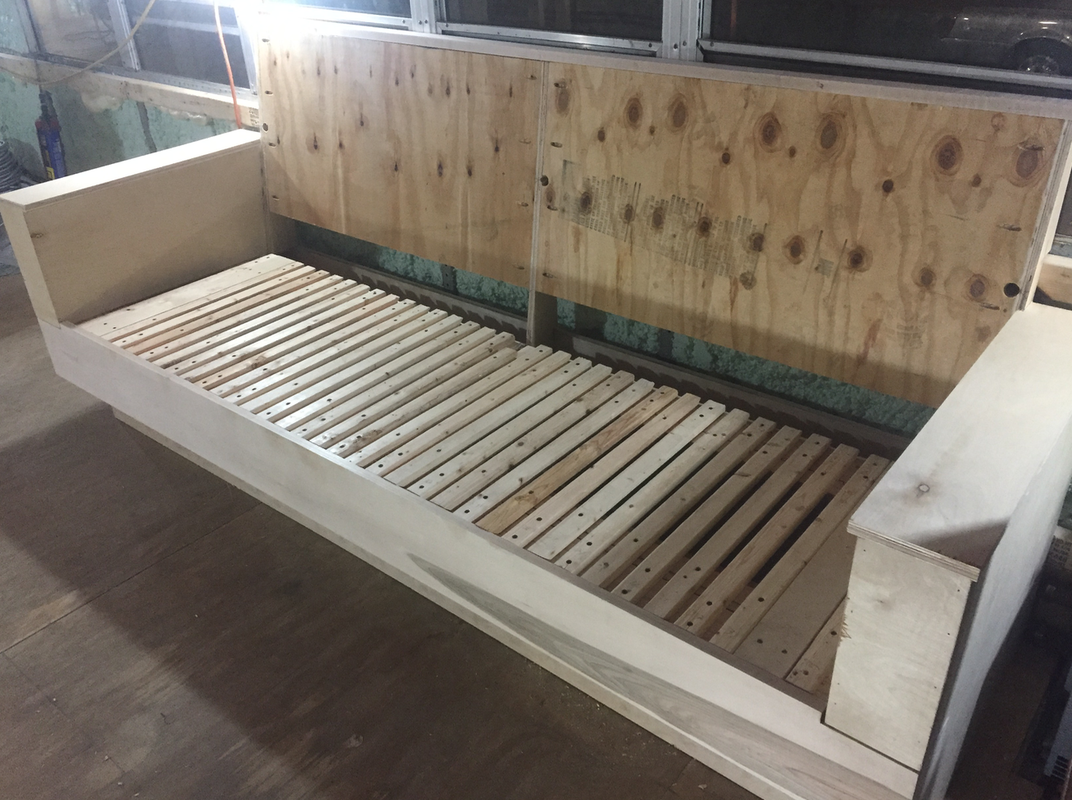 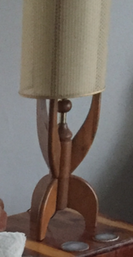 This was super fun to see once it was built. There's a piece of furniture in our bus! Matt designed and built it with a touch of mid century modern in mind because we plan on using some of our current decor in the bus eventually. We have this super cool lamp that will go on a floating shelf next to the sofa. We wanted a place for guests to sleep but also to function as our entertainment space. We also decided we wanted to store our battery bank inside the bus away from the outside elements. With that in mind, we needed the couch to have three purposes: a sofa, a bed, and provide storage. A rough sketch was drawn then the cutting began. The carcass was cut from 3/4" sheets of birch. The front rail, arm rest, and top rail are cut from maple. The armrest functions as storage with each top being hinged with full overlay hardware. The back rail of the couch seat is stationary from front to back but is hinged up and down. We attached every other 1x2 to the back rail with screws. We did the same process to the front rail, keeping all the 1x's spaced evenly using an upright 1x as a spacer. The slats that are fixed to the front rail were then fastened on the back to a 1x that sat just in front of the back rail on the underside. This proccess is a bit tricky to explain but not that hard to build. 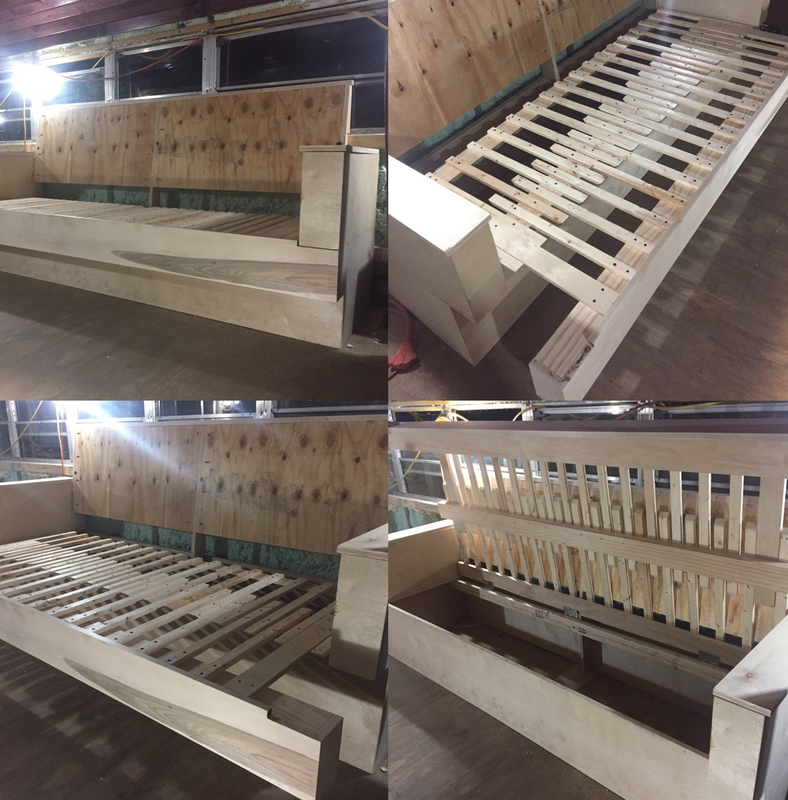
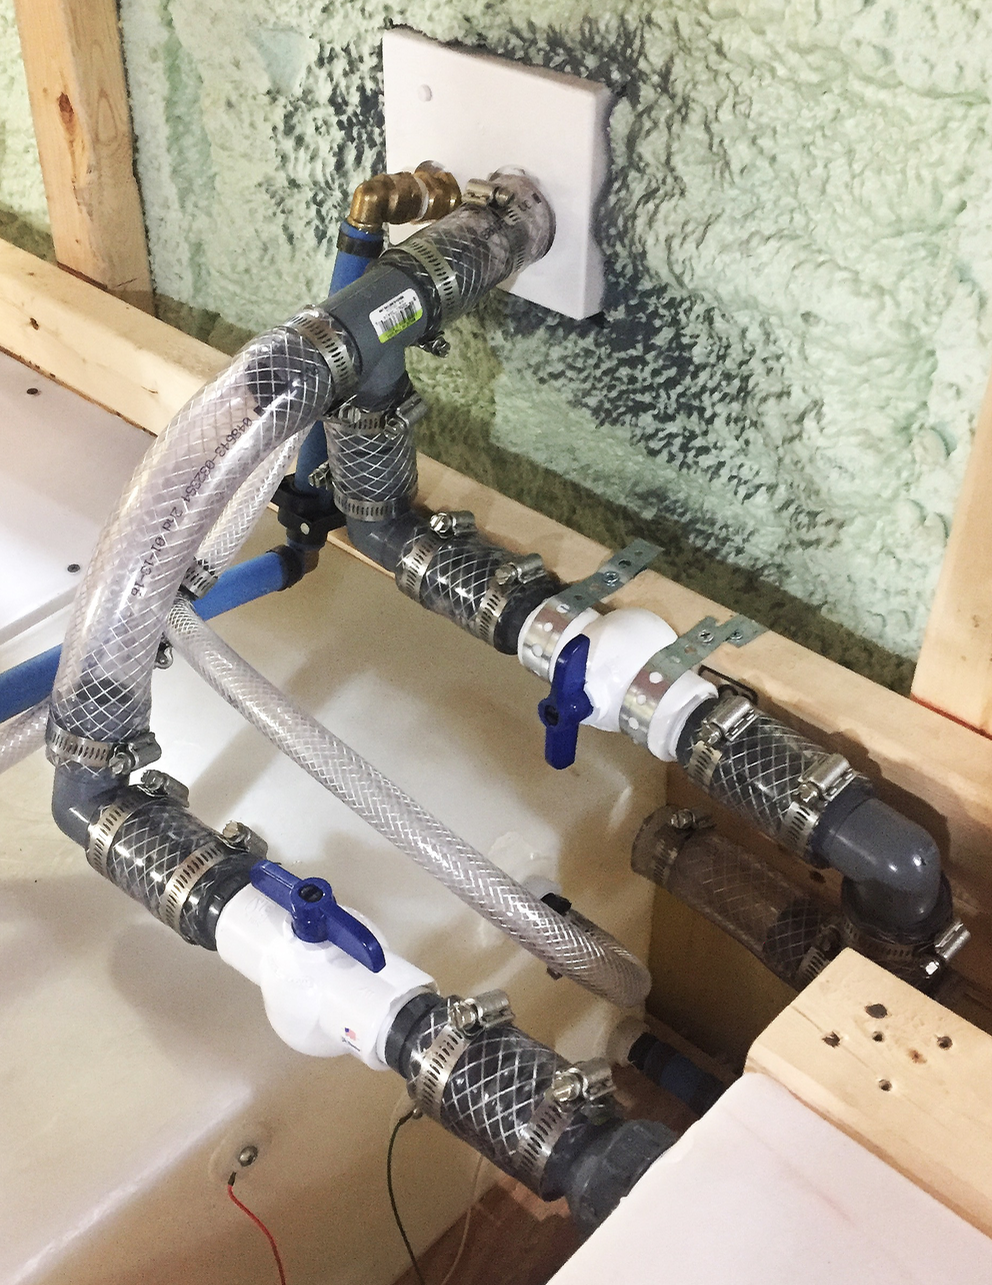
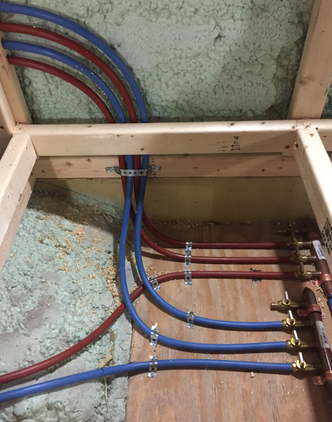
Our plumbing is not done as of this point but we are close. From the beginning of our system, we have a two-way fill valve with a locking door. Right now we can either connect a water supply directly to our lines (city fill), or just fill up our fresh water tanks through the gravity fill port. If connected to the city fill side, the water bypasses the water pump and Ts directly to a four-way manifold then to the cold water fixtures, or to the hot water heater, then through a four-way manifold followed by the hot water fixtures. All of the water supply lines in the bus are piped with PEX and connections made with quick connect or crimp fittings.
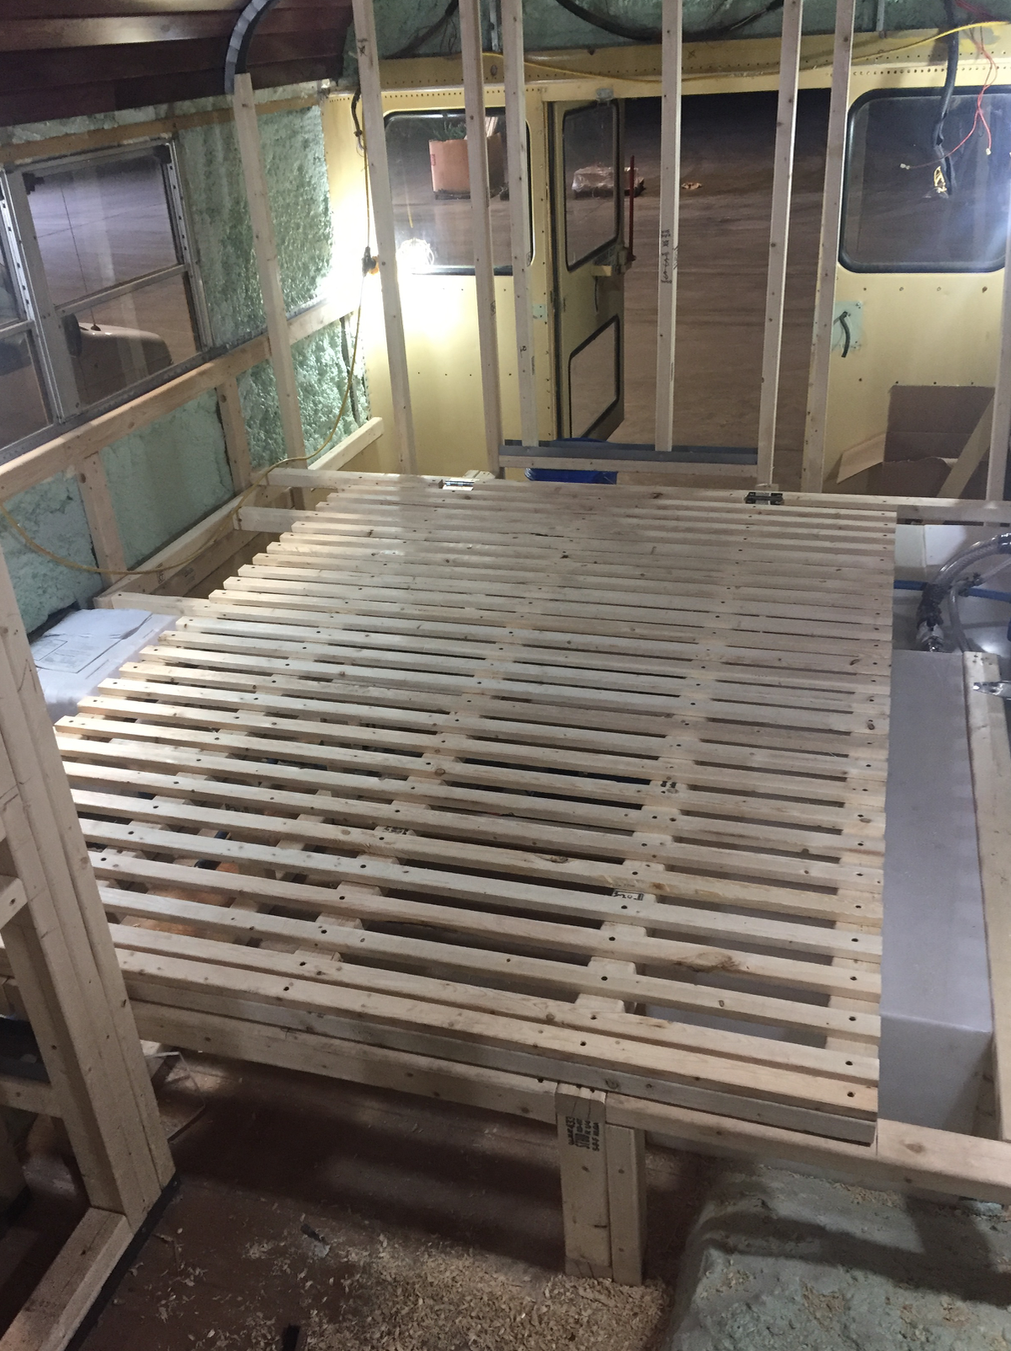
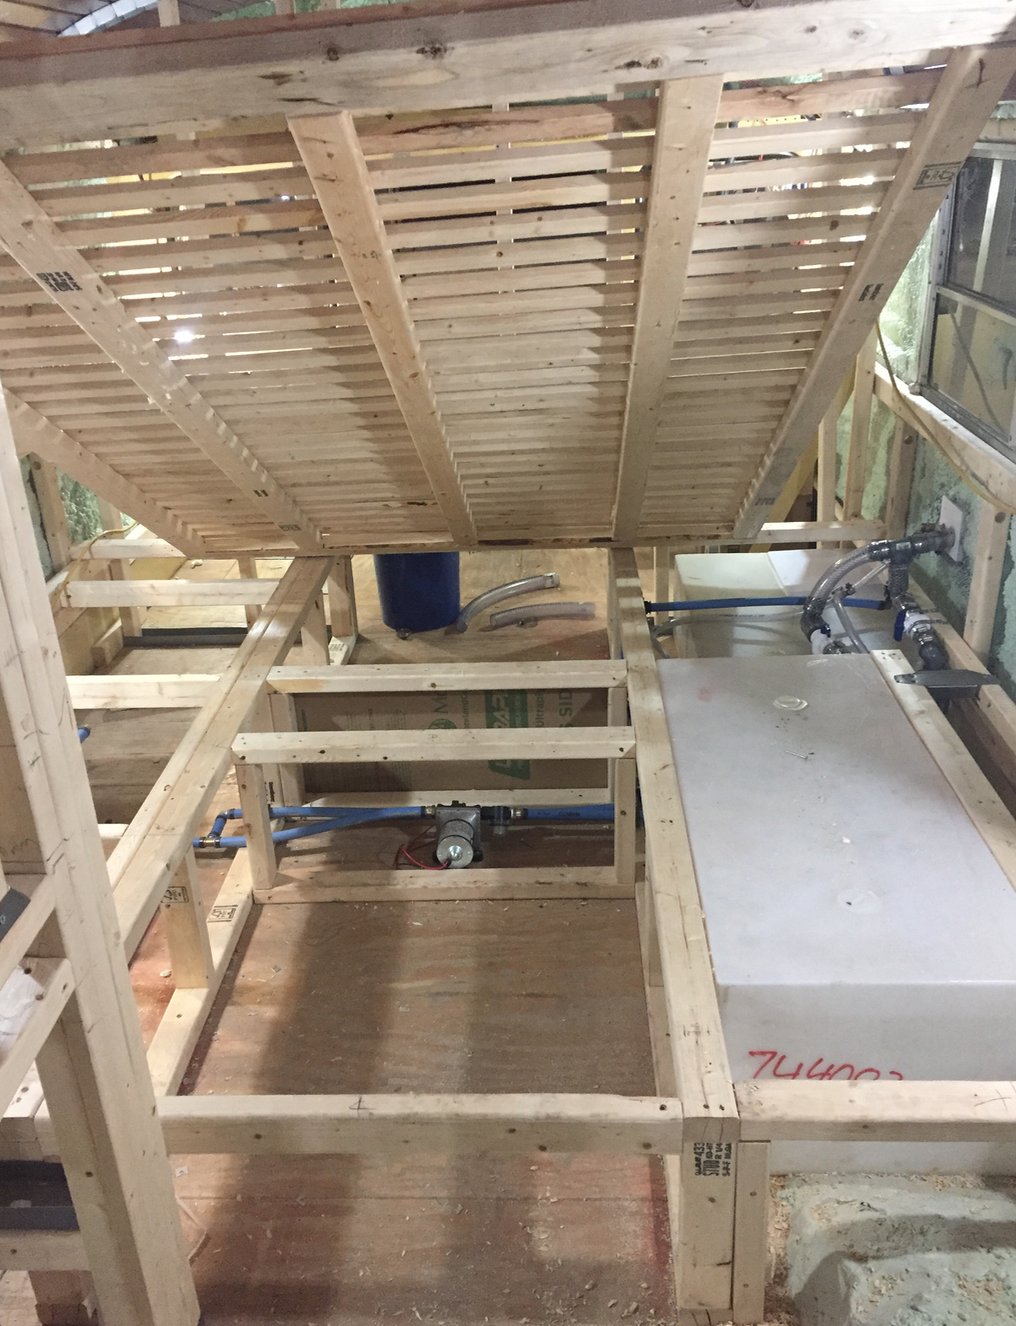
If we are using the gravity fill to top of our fresh water tanks then the system begins with vinyl tubbing to shut of valves. We have 1/4 turn shut of valves for both tanks. This allows us to control which tank we want to feed water into. Both tanks have a vent line at the top that allow air to exit the tank as water is being displaced to avoid the chugging effect. At the bottom of each tank, water lines run to our Surflo water pump that then meets up at the same T as the city fill branching either to the cold manifold or hot water heater. Our water pump has a built in check valve which prevents a back flow through system if were hooked up to the city fill. We have three drains, plus our urine diverter which ties into our vanity waste line. There are two sinks plus a shower which all tie together and go to our holding tanks. To support our holding tanks, we used threaded rod and unistrut. The rod was cut to desired length then holes were drilled into existing steel beams under the bus. The rod was then fed through each hole and secured with nuts washers split washers and the same on the other side of the beam. A height was then determined for where the tanks would be held. Then more nuts and washers were used before sliding unistrut to that height then our holding tanks followed by another unistrut with nuts and bolts. Flat stock steel was then attached on the out side edge connecting both top and bottom struts to help hold them true. 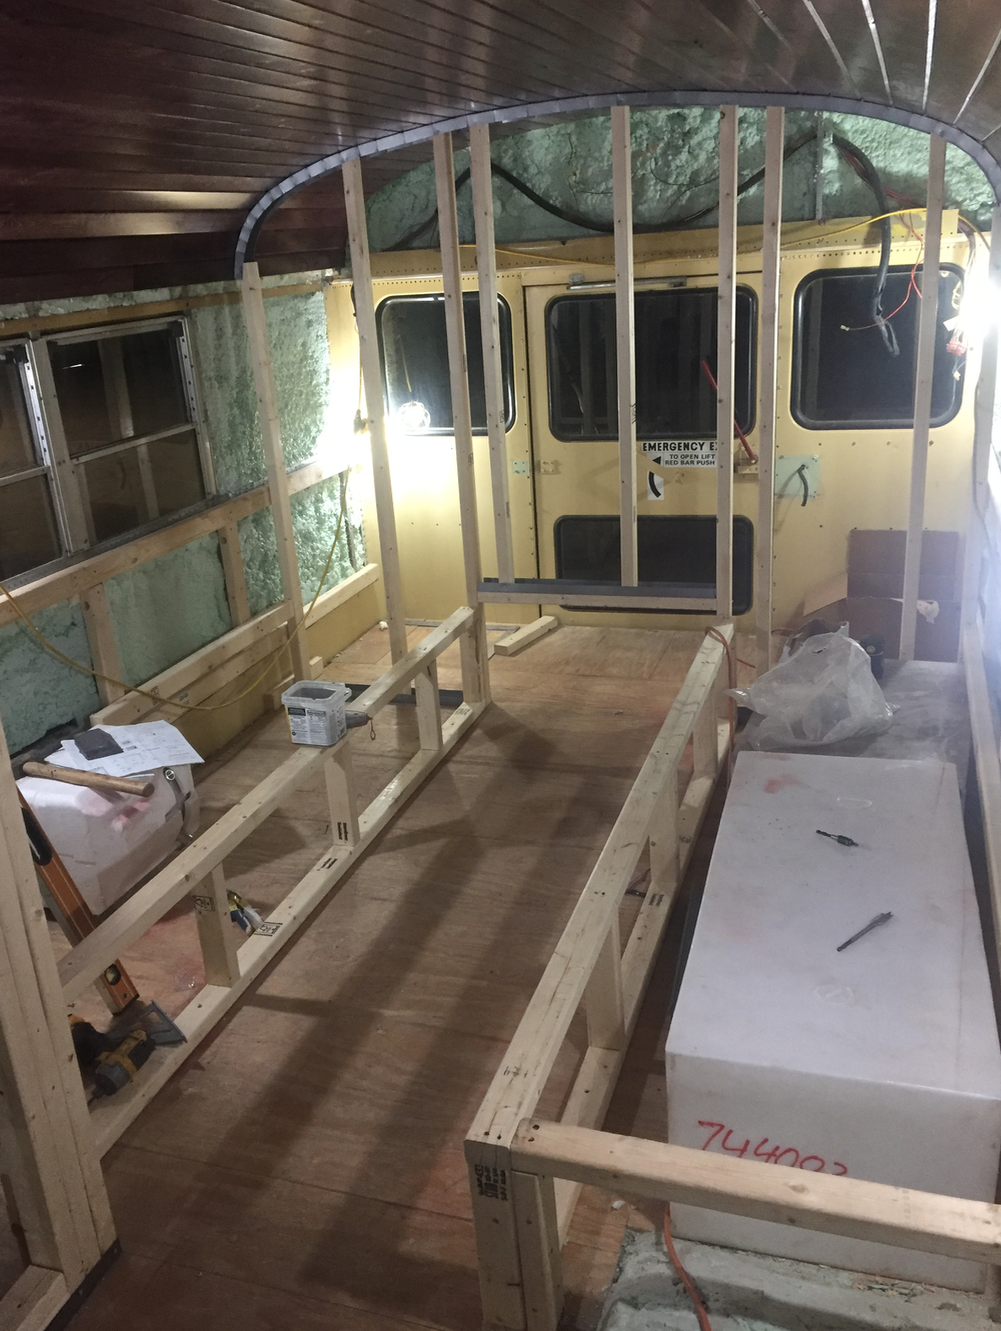 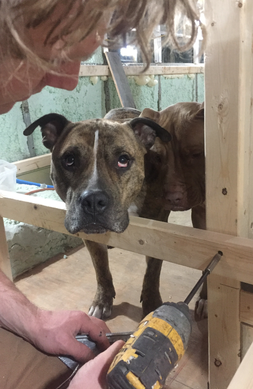 Framing the bedroom was fairly simple- just used the same materials as we did for the bathroom. We did have to account for the fresh water tanks and hot water heater which will be underneath the mattress. One of our fresh water tanks is 45 gallons, the other is 35 gallons. Plenty of water for us! Our hot water heater, on the other hand, is only 6 gallons, so we will definitely have some adjusting to do there- quick showers only! <The dogs love to watch what loud tools we using, haha! The hot water heater is not currently completely installed but we have the hole cut for the access panel on the outside. Access to the fresh water tanks is mounted outside the bus as well so we can either use a gravity fill or just fill up at a fill up station and use the water pump. There is a lock on this access panel so no one can sneak into our water supply. Our water tanks have an electric sensor on them so when the water gets to a certain level, it notifies us so we don't run out without knowing. We will also have access to the shut off valves for these tanks within one of the cubbies on the side of the bed. More details on that in the next post. We used a slatted design using 1 x 2's for our bed frame because we wanted to keep it fairly light weight (we will later put gas shocks on the "lid" to make it more easily assessable), and also to let air circulate through the mattress. You can see in the right picture access to the water pump and in front of that will just be extra storage, most likely for seasonal clothes/supplies.
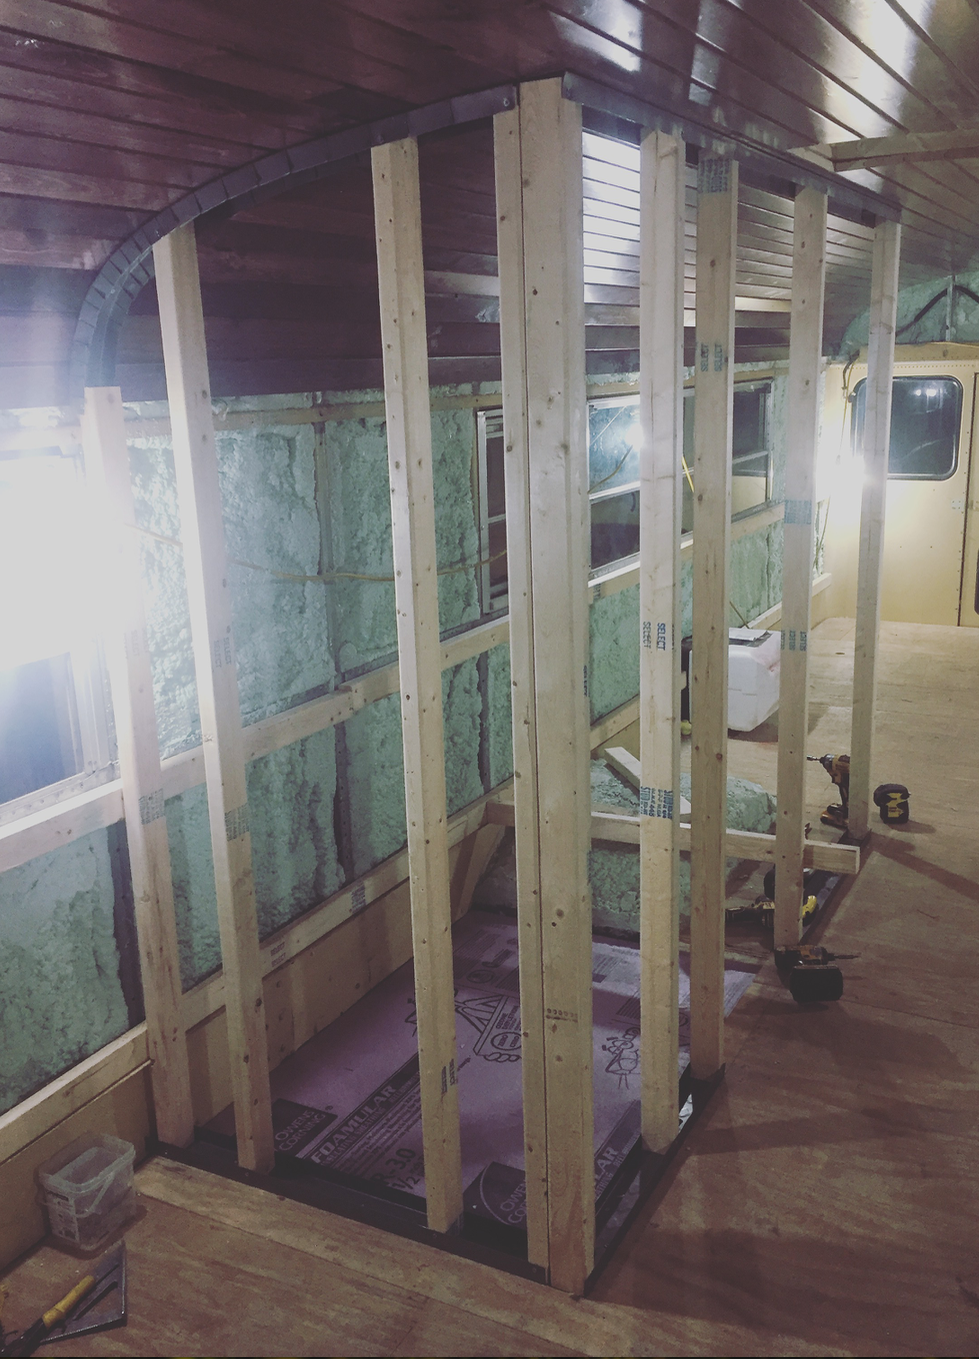 Just before we were ready to frame in the bathroom, we realized that we really had to decide what kind of flooring we wanted to do, because head space was getting a little tight, plus we wanted the floor transition to be smooth. Our options were either tile, a shower pan, or a slatted wood platform with a hidden tray underneath to drain. We ended up deciding that we wanted to go with tile, because we liked the look of that the most and still gave us plenty of head room. More details on tile and materials later. We came to the conclusion that in order to ensure a smooth floor transition from room to room, we were going to have to take out some of the subfloor we had already put down and redo the insulation and subfloor for that area... ugh! We replaced the 1.5" foam with 1/2" foam, then 1/2" plywood so our tile would be flush with the other floor- a curbless shower!
So after we figured that out, we framed the bathroom using 2 5/8" metal track and 2x3 wood studs. Using the metal track made it easy to attach our studs to the ceiling following the curve. Using tin snips and making cuts on both side of the track allowed us bend the track. Matt has used metal track in commercial framing for years so it just made since to go this route. We used 2" self tapping screws to fasten the top track to the ribs of the bus giving it more structural integrity vs just screwing into the pine ceiling. 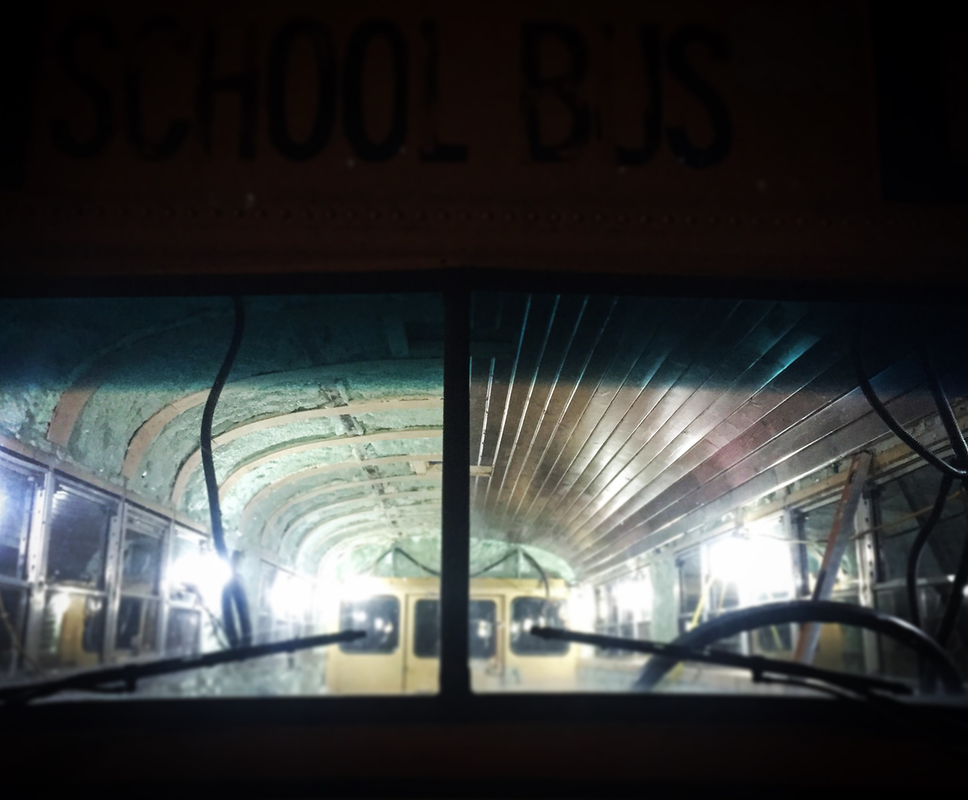 It all looks fairly easy doesn't it? Well, there were some things to figure out before actually putting that beautiful ceiling up. How are we going to actually attach these boards to the frame of the bus? The ribs on the ceiling are only a 1.5" wide, and there are holes every inch from removing the rivets. We knew we didn't want to use self taping screws leaving the screw heads visible every 2" and wood filling the holes would of worked fine if we painted the ceiling but not so much for our stained pine. So to attach the tongue and groove boards traditionally we needed a wood surface with no metal behind it. So we took 1/4" plywood, ripped it down to 6" strips and centered them on the ribs giving us an overhang on each side where we could shoot finish nails without hitting any metal(structual ribs). The tighter curves above the windows were a bit tricky because the plywood couldn't make those tight curves without snapping. So we borrowed my mom's old wallpaper steamer and steamed them for a couple mins each to make that tight bend. The alternative would of been to make a steam box but for these short pieces the wallpaper steamer worked perfect. I would press them into place with a good layer of PL 3X Construction Adhesive as Matt screwed them to the ribs (screws about an inch apart) starting at the top and slowly working to the bottom. Worked out great! There is a flexible plywood product that would have worked without all the steaming, but it's twice as expensive- about $28 per sheet. We went the cheaper route, but glad to save where we can!
Another big thing we had to think about before we actually shot those boards up was making sure to run any electrical needed in the ceiling, which in our case was the AC unit, Fantastic Fan, and some lighting. Most of our wires will be ran behind the walls, but these few spots had to be accounted for. 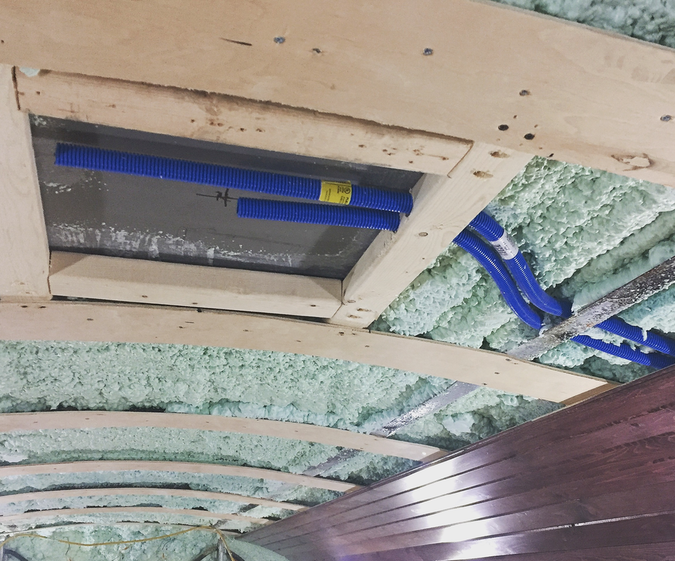 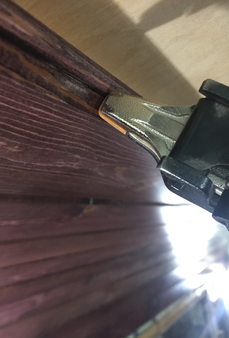 To fasten the pine boards to the furring strips, we used more PL 3X Construction Adhesive, and Grip-Rite 15 gauge finish nails, shooting into the groove of the tongue, to ensure a more finished look. We of course carefully selected which boards we wanted where... the most attractive ones went above our bed so we can look at them while we lay down! Some were the full 12 foot length, and some were cut down just to create more variation. We also took into account where the bathroom would be and kept all seams/end grains out of that area to prevent moisture making its way into the end grains of the pine. So much thinking ahead!
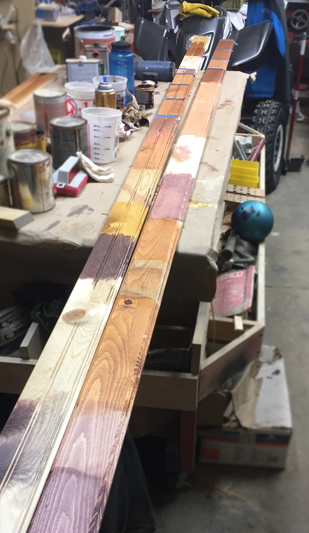
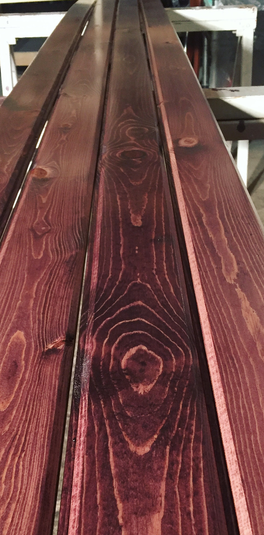
Wow. It has been a long time since our last post. Honestly, once we got the spray foam up, we started bookin' it and it seemed like there was no time to keep up with the blog! Tonight, though, we are taking the night off to research and catch up on a few other things, so I'm going to take a little time now to update everyone a little bit on what's new! Every step of this conversion has been more and more exciting, but this is one of the big ones. WE GOT THE CEILING DONE! We knew from the moment that we got the bus, that we wanted a wood ceiling. We did question from time to time if it would be bright enough in the bus with a wood ceiling- we thought for just a moment if we put the white panels back up, it would definitely be nice and bright (and a lot less work), but it didn't take long for us to just say, "Nope, we want the wood ceiling." So we did it and oh my gosh, it is the most beautiful ceiling I've ever seen. 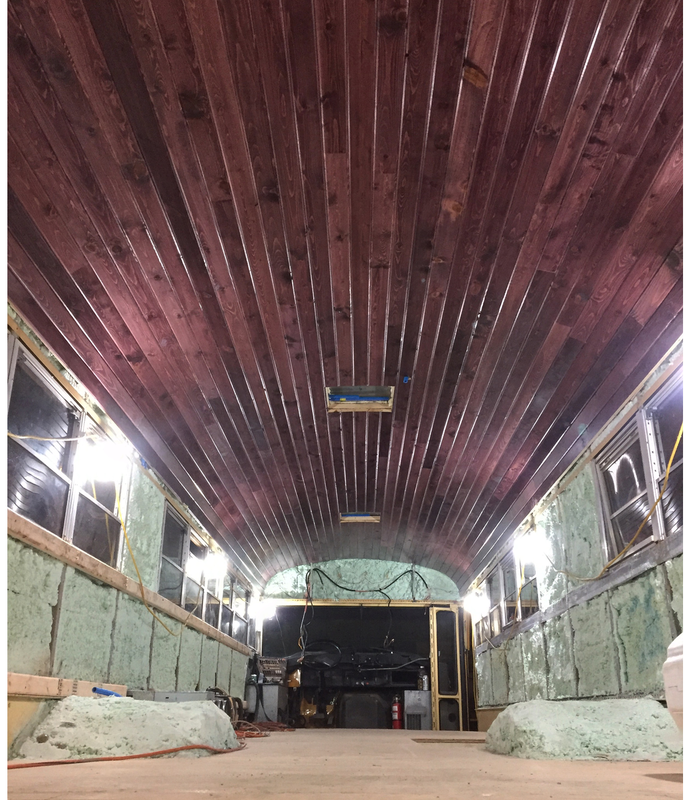 It took us some time to decide what type of wood we wanted. We went back and forth between pine and cedar. Absolutely loved the look of a natural cedar but couldn't justify spending the money, so we went with pine. We bought 12 foot long 1" x 4" unfinished pine bead board and sanded and stained each board in black cherry. It took us probably two days to decide what stain color we wanted and it's funny that we ended up choosing the black cherry because it started out as a joke actually. It had a pinkish-purple color to it that looked really weird at first, but there was just something about it that we liked, and it was something different.
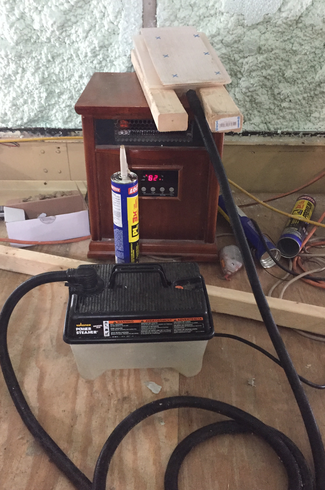
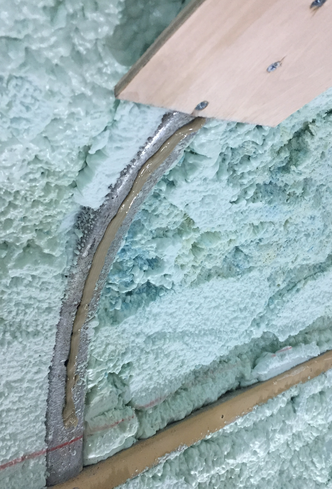
After carefully sanding the boards, we put a coat of shellac on them to avoid a splotchy stain (apparently this is especially common with pine). Once the shellac was dry, we applied a single coat of the black cherry stain with a rag. Finally, we put two coats of polyurethane to seal it. The whole process, from sanding to sealing took us 4 long nights. We luckily have a friend who was nice enough to let us use his shop and sprayer. Thanks Reed! 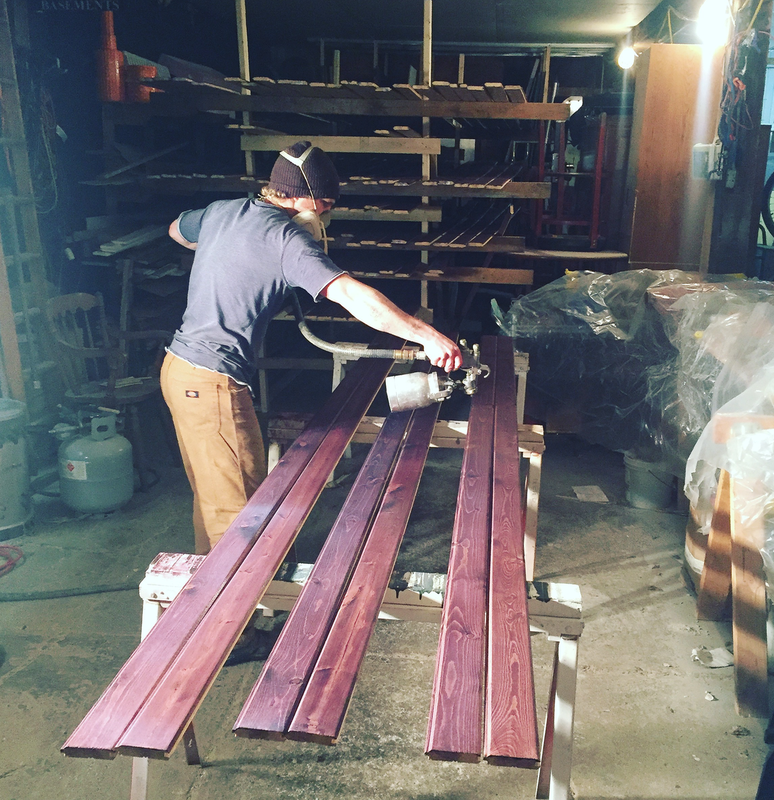 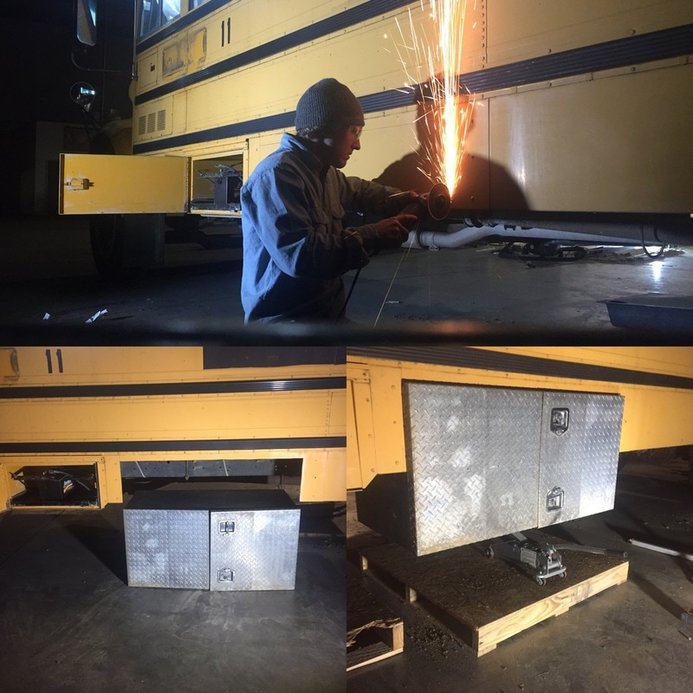 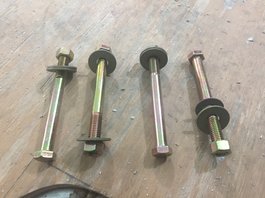 While we were waiting for our spray foam to be delivered, we had some down time to work on other projects. We found some really good deals on these used tool boxes for extra storage. The aluminum one measures 48''w x 24''h x 24''d on the drivers side and will be used for our solar power battery bank/electrical component storage. The other box is made from steel and measures 72"w x 16"h x 16''d and is located just behind the rear axel on the passenger side. This box will most likely store camping supplies(chairs, cooking utensils, hammock, etc). This process was fairly simple and didn't cost a whole lot of money. We only bought eight 6" Grade 8 Bolts with two washers and a nut for each bolt and used a couple 2" x 3" studs we had laying around as well as some Threadlocker to prevent nuts from vibrating loose. The first thing we did was locate where we wanted them, then assessed weather or not it would work with the structure of the bus. Our bus has a 12" skirt that runs from the front to rear wheels of the bus and is held rigid with gussets extending from the skirt to the underside of a floor joist which had to be removed for the tool boxes to fit in the desired location. To remove the gussets, the rivets attaching them to the floor joist had to be drilled out and pried off. We made the rough opening width a 1/2" wider than the box measurements and made the top cut at the bottom of the floor joist. The aluminum box has doors that open to the side so we either had to make our width opening another 3" bigger or pull the box out to the depth of the doors so that they could fully open. We didn't want the 1.5" gap on each side, so we decided to pull the box out a little. Once the opening was cut and the gussets broke free, we determined where we wanted the bolts to penetrate each box, then pulled that measurement off the outside of the bus and marked the location on the underside of the bus. We used a 3/16" metal bit and predrilled each hole from the underside of the bus. Then came back and drilled the same holes with a 1/2" which was long enough to penetrate through the foam and subfloor inside the bus, giving us the exact location of each bolt. Then we lifted each box into place using a car jack. From the inside of the bus, we could now drill back down through each hole into the box and then use a 1.5" paddle bit on each of the bolt holes drilling down only through the subfloor and foam. This gave an opening big enough for a washer on each bolt and recessed them below the subfloor so there will be no issues with any kind of protrusions in the finished floor. To distribute weight on the bolts holding the boxes, we ran a 2"x3'' studs inside the length of the box; one up front and one in the back. We held each board in place and marked the location of each bolt, then drilled holes accordingly. The lumber was then put into position and capped with a washer and nut. Finishing out the rough opening of each box, a piece of L metal will be riveted over each side of the rough opening to give it a clean look. Since the doors on the aluminum box will sticking out past the side of the bus, the thought of water getting inside the box became a potential issue. The steel box already has a rain guard on the top, so we will be creating our own rain guard on the aluminum box by bending a piece of metal to a Z shape to mount above it. 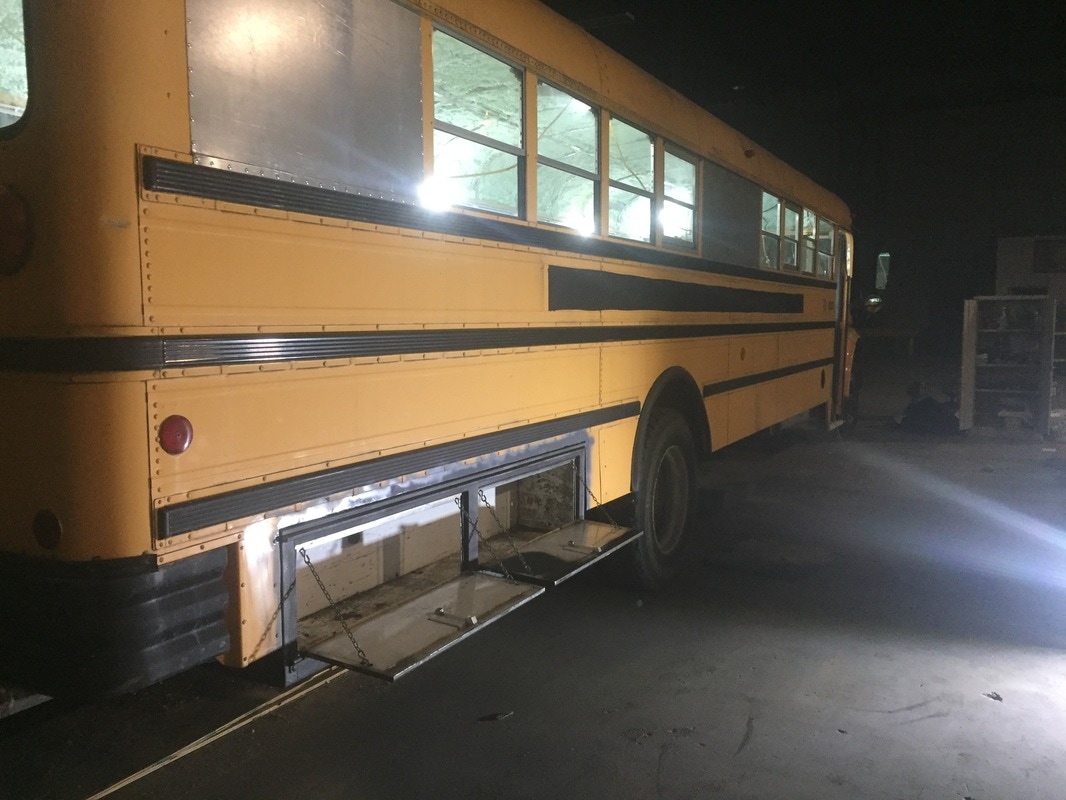 Getting the insulation done was probably the most excited Matt and I have been since buying the bus. It's a big step to get this part done because now we can start framing and making it look like a real place to live! 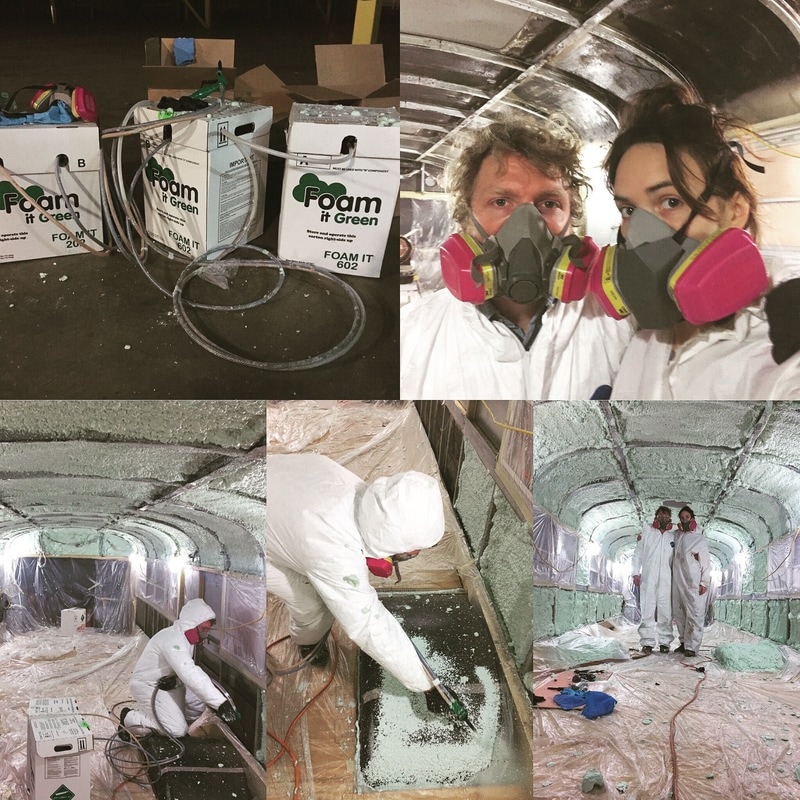 To prep for insulation, we covered any exposed wires, windows, floors, and dash with painter's plastic and used a grinder with a wire brush wheel to remove the remaining fiberglass insulation that was glued to the panels. We did this so the spray foam would have a nice clean surface to bond to. We went with Foam It Green for the insulation. There are several other spray foam companies out there to choose from but for the price and the additional items they sent with the tanks and their good track record, we decided on Foam It Green. The tanks we got were the 602 closed cell fast rise formula which covers approximately 600 square feet. We also had a 202 kit that we had left over from another job that we used to fill in any low spots once the other tanks were used up. The process is fairly simple, although there are some things that can make it a lot more efficient. First off, our bus is stored in a warehouse which is climate controlled up to 45 degrees so we had to run a salamander in our bus for an hour to get the metal within the temperature range recommend by the manufacture (65F-85F). When the metal was at the appropriate temperature, we suited up with full body Tyvek suits, respirators, gloves, and eye protection. Once we unboxed the equipment, we shook each A&B tank for 60 seconds then attached the lines to the valves and clipped the spray nozzle onto the gun. Since we weren't sure if we would cover the entire space with the 602 tanks, we started on the ceiling and head walls. This way, if we ran out, it would be easier to insulate the wall cavities with foam board opposed to the curved ceiling or head walls at each end of the bus. While Matt sprayed the foam, I helped by moving the tanks down the line as he moved and also shook each tank periodically throughout the process which is supposed to help get the most out of the tanks. I also kept an eye out for low spots and gave him new nozzles when they needed replaced. When the 602 tanks were out we hooked up the 202 tanks and went over the entire bus and thickened foam where we desired. The 202 tanks we got had been sitting in a shop for a couple years and about 3/4 of the way through the tanks the mixture started getting inconstant so we stopped there. Our bus measures 26 feet from the rear to the passenger seat and we ended up having more then enough in the 602 tanks to cover 1" throughout our bus. Since we had the extra 202 tanks, we figured we would use them for any extra spots. This process could be done with one person but definately much easier with two people and it only took us just over and hour to spray from start to finish. The next day, Matt went to the bus and use a 26" hand saw and an Irwin 213104 Pull Saw Dovetail for the smaller, hard to reach areas. This only took an hour since he was diligent during application so there wasn't a ton of over spray. Overall, we really happy with the results and are excited so start framing soon. 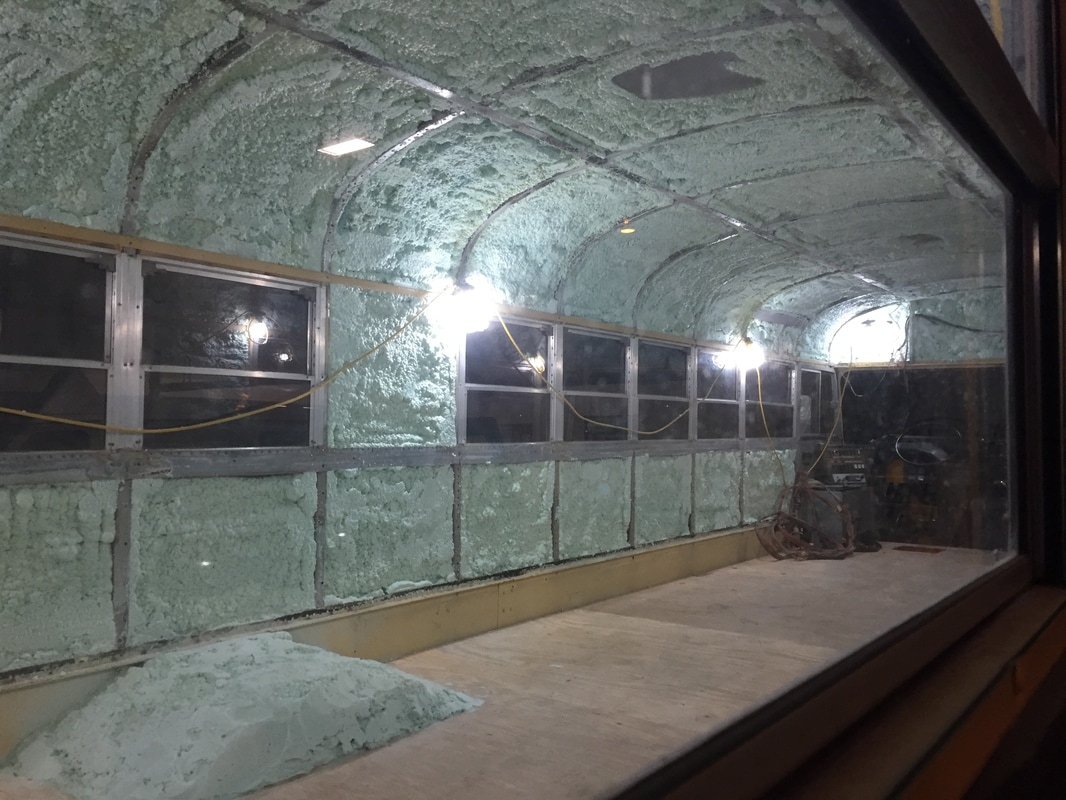 Benefits of spray foam:
|
AuthorHey everyone! Archives
September 2018
Categories
All
|
 RSS Feed
